Showing posts with label pink. Show all posts
Showing posts with label pink. Show all posts
Tuesday, January 19, 2016
2 matching baby quilts
Labels:
Applique,
Baby,
black,
embroidered,
Embroidery,
flower chevron,
free-motion,
girls,
grey,
letters,
monogram,
name,
newborn,
pink,
quilt,
quilted,
text,
twins
Thursday, November 5, 2015
Wedding Signature Quilt
The Cabell's decided to have their guests sign fabric instead of a guest book.
I am honored that they chose me to make their wedding quilt!
For the quilting in the white open areas, I chose a version of paisleys but with hearts.
Here is the quilt after all the quilting is finished, before binding
And what an absolutely PERFECT day (and time) for photographing this quilt! Right before sunset!
I added some FF Triangles to the back of the quilt for hanging. I feel like the triangles don't add the bulk like a sleeve does. But the triangles are only strong enough if the quilt doesn't weigh too much.
Aren't the shadows spectacular?!
Here's a closeup of one of the signature blocks. I did the same thing for MY wedding. . . hopefully I will make mine by the time our 10th anniversary rolls around ;c)
Thanks for stopping by!
For all the latest photos please "like" my facebook page: Facebook.com/KatiesQuiltsAndCrafts
Sunday, November 16, 2014
Amelia's 1st birthday Quilt with Minkee Backing and Binding.
I wanted to give sweet baby Amelia a "Katie Quilt" for her birthday. I used everything from my stash. I started with this large piece of minkee fleece that I had leftover from another project. It's super soft and BIG so I didnt' have to piece fabric together for the backing. I have used Minkee for backing before, but I always used batting ALSO, but this time I left out the batting. For a large, bed-size quilt I think batting is fine, but I wanted something that she could lug around herself, so it needed to be LIGHT too.
Double Sided Minkee is thick enough that it doesn't require batting. Also, it gives a very nice effect when free-motion quilted. However there is a slight downside when you omit the batting. When there is no batting, there is nothing for the fleece to stick to. The batting acts as a stabilizer so that your fleece doesn't shift around. To remedy that problem I just used lots of safety pins in the basting process.
For the quilt TOP I pieced together feminine prints of pink and grey. Honestly, I'm not real sure what I was going for here - just scrappy I guess!! Who knows, it was late when I came up with this design ;c) I think a quilt looks best when you incorporate elements from the back on the front, and vice versa. So for the front, I appliqued circles of minkee and also used the minkee as the binding.
** I have a tutorial on how to do self-binding with fleece HERE**
And for the backing I took one of the pink floral prints and used it to applique her name.
In this last picture you can get a good look at the quilting design I used. I always want to try these fun large-scale quilting motifs, but am always too scared. I love the look of all-over free-hand feathers, but every time I attempt them I regret it. I think maybe it's because I think every tiny bit of space needs to be quilted - and everything needs to be touching.
So for my last couple projects I have been trying to use more negative space. I think just as rainbow colors only look good with a good amount of WHITE. . . . "fancy" quilting only look good when there is some negative space? Maybe? I'm working on it anyway!
Labels:
Baby Quilt,
backing,
batting,
binding.,
FMQ,
free-motion quilting,
grey,
light blue,
minkee,
minky,
modern,
name,
personalized,
pink,
quilted,
raw edge fusible applique,
scrappy,
White
Saturday, July 5, 2014
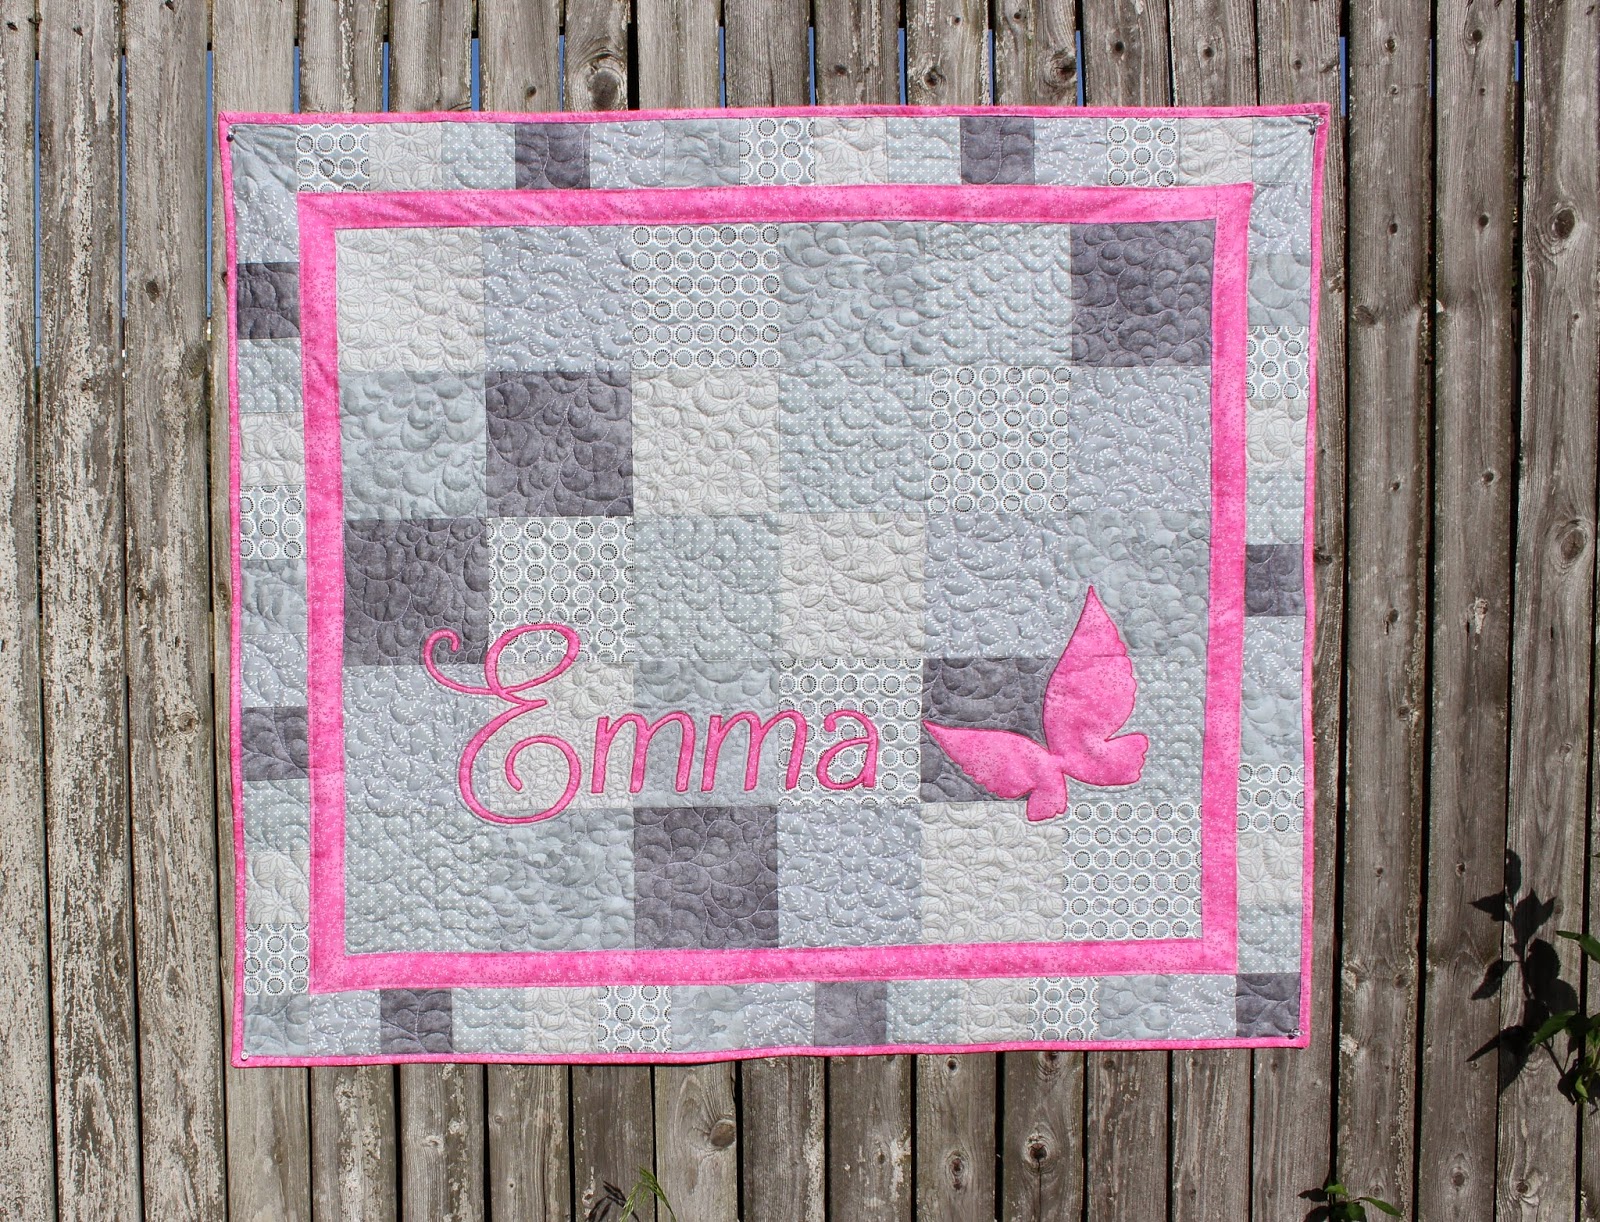
Beth's Quilt for Baby Emma
A beautiful baby quilt with patchwork greys in subtle prints, with pretty pink applique, border, and binding.
Here's the top finished, and basted before adding applique.
I do a technique called raw-edge fusible applique, and I go through all layers of the quilt. So here I start with the background quilting first. I'm using a paisley flower motif.
Love the quilting ;c)
Labels:
Applique,
Baby Quilt,
darning foot,
elizabeth porter duke,
emma,
flower,
FMQ,
free-motion,
grey,
paisley,
patchwork,
pink,
quilting,
Raw-edge fusible
Wednesday, March 27, 2013
Franki's Baby Quilt
I made this quilt for my friend Franki, who is having a baby next month: "Mia."
She wanted Pink and Green, so I dug through my pinnk and green scraps. The piecing for the front and back I kept relatively simple, but I went crazy with the quilting. my favorite part ;c)
Here is the front and back before sandwiching.
I divided the quilt up in diamonds and wanted a 1/2' puffy line between each quilting motif. In the above photo I had just finished the trapunto for Mia's name, the pebbling in the 1st section, and half the feathers in the 2nd section.
Here I had just finished all the quilting.

Before trimming and binding.
Closeup of the quilting.
andddd. . front and back finished!
All of the quilting was done with NEW Aurifil polyester longarm thread. The pastel variegated thread looked perfect against the pink and green fabrics. . . used in the top AND bobbin.
Labels:
#Aurifil,
Baby Quilt,
feathers,
FMQ,
free-motion quilting,
green,
hearts,
mctavishing,
pebbles,
personalized,
pink,
simple patchwork,
stippling,
Trapunto
Subscribe to:
Posts (Atom)


