
Here's a Tute for a very Basic version of my Decon Tee-skirt pattern.
I am offering this pattern to you FREE to keep old clothes out of landfills and to help our Mother Earth. Please DO NOT SELL this pattern, and DO NOT SELL skirts you have made from this pattern. Please DO Make or Donate as many as you wish! ...and please. .if you do decide to make one. . by all means share a photo with me! I would also love to share the photo with everyone here on this blog!
If you have any questions, just leave them in the comments section below and I will answer them ASAP =cD
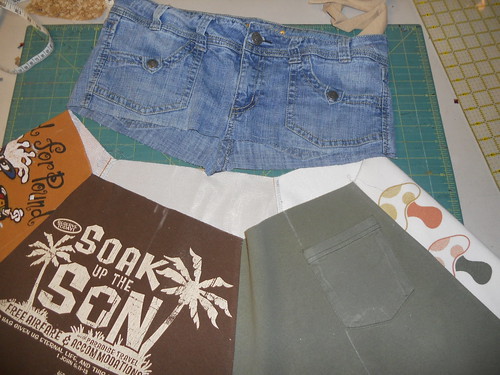
YOU WILL NEED:
1. One Pair of old jeans/Skirt/Shorts of a sturdy material i.e., cordoroy, or denim (Because of this design, you can use a pair of jeans that are 1 or 2 sizes too small )
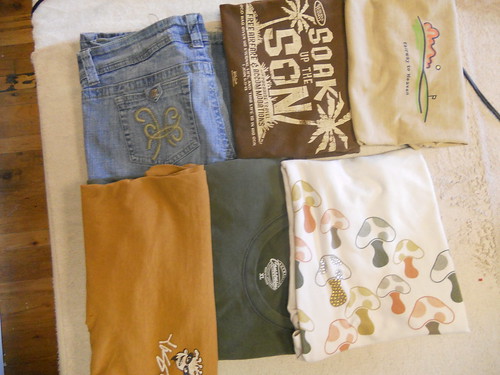
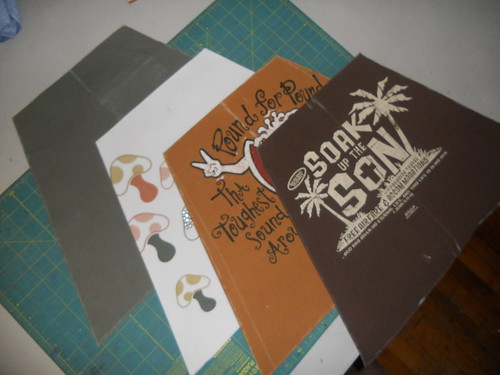
2. A few old Shirts, can be Tee-shirts or Woven, doesn't matter (I used 5 total)
3. Good, Sharp pair of scissors
4. Iron
5. Sewing Machine (you could do this by hand but it would be a real pain in the *****)
6. Measuring Tape
7. Chalk (or other washable marking tool)
9. Block Ruler
10. Thread/Pins/Needles/etc.,
Optional (but highly recommended):
A friend to help with measurements
Starch
Rotary Cutter and Self-healing mat
Stretch Needles (great for sewing together tee-shirts)
Pre-made Bias binding (for hem)
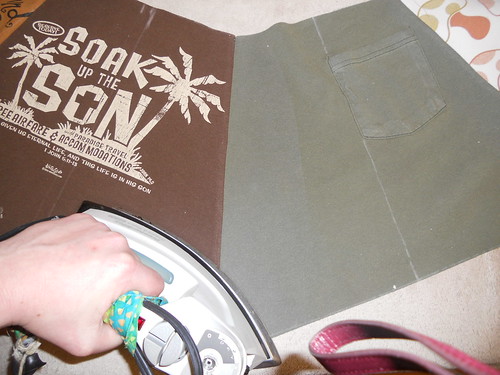
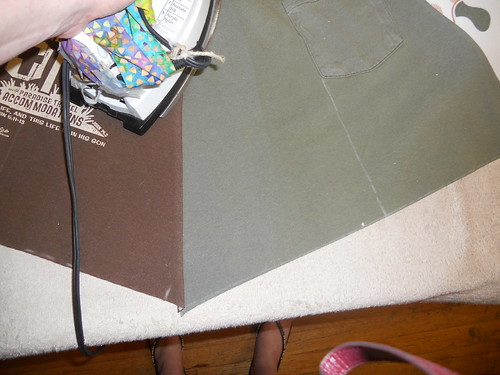
*Press and Starch all your garments
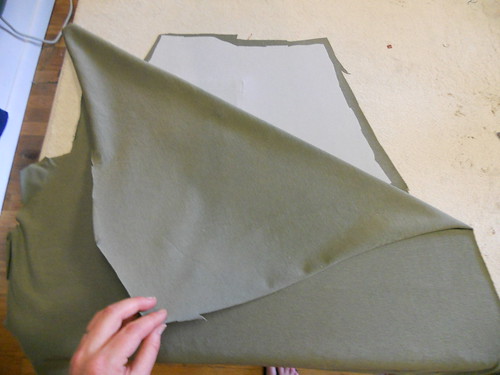
*Fold your jeans in half by grabbing the crotch in the back with your finger, and then keeping the waiste line straight. Lay your now folded jeans on your cutting mat , keeping the grain line of the jeans parallel to the lines on your cutting board.
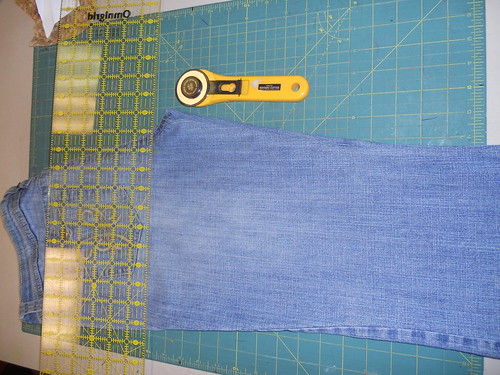
* Make a straight-across cut, right below the zipper or right above the crotch area - try to make your cut perpendicular to the grain lines.
*Set your excess jeans fabric aside. . . . for another project ;c)

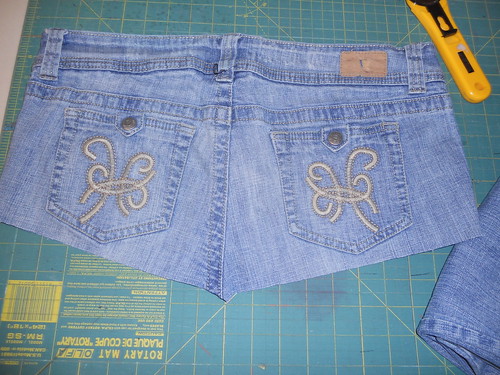
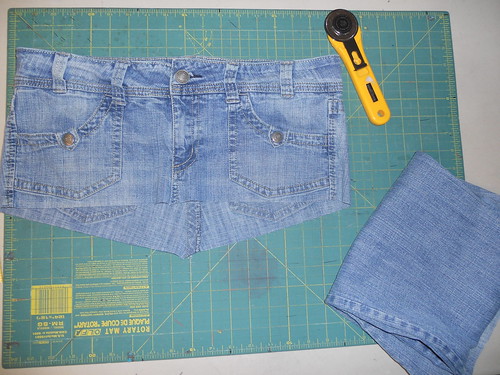
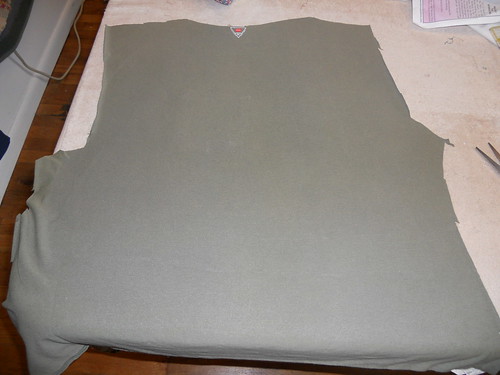
* With your scissors, straighten out the Center-Front and Center-Back seam areas. In this photo you can see where it goes in a "V". . . just take your scissors and snip that off - You don't want any Angles when you start attaching your shirts.
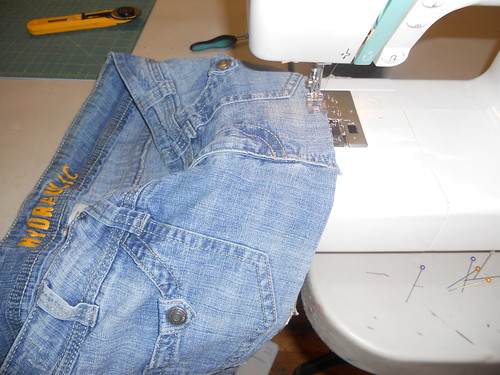
*Staystitch along the edge to prevent fraying.
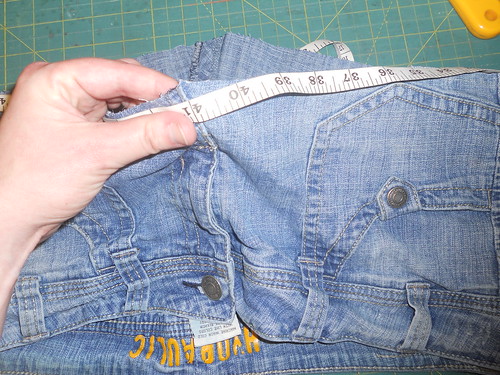
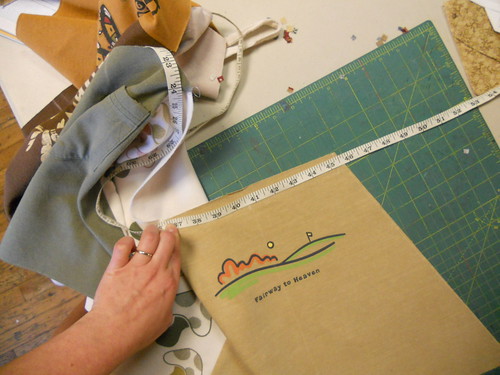
*Starting from the Center Front Seam, Measure all around the circumfrence of the cut-off jeans. WRITE THIS NUMBER DOWN (My number was 41)
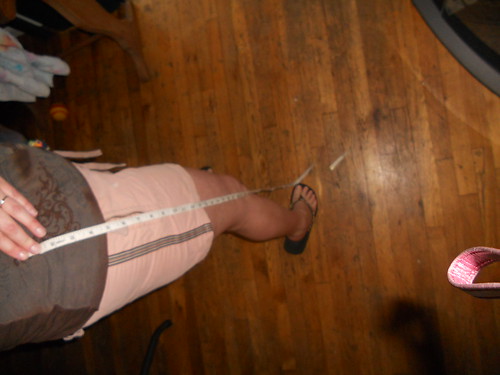
*Starting at your NATURAL Waiste, measure down your leg to where you want the skirt (bottom/hem) to end. WRITE THIS NUMBER DOWN I like my skirts to end right above the knee. For me this number was 21. (About your natural waiste: Girls, this is not your coin slot, this is the smallest area around your middle)
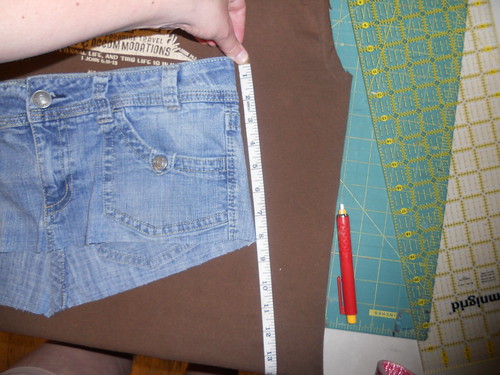
*Measure one of the side seams on your cut jeans from Waiste to Cut. WRITE THIS NUMBER DOWN (For me this number was 8)
*Now for some calculat'n ;c)
A - - Cut Jeans Circumference: Me (41") You =
B - -Cut Jeans Side Seam: Me (8") You =
C - -Length from Waiste to Knee, or where you want your hem to be: Me ( 21") You =
D - -How many shirts do you have? Me (5) You =
E - -Circumference (41") /Shirts (5) = Me 8.2 rounded to the nearest whole number is (9"**) You =
F - -Length of Hem (21") - Side Seam (8") = Me (13") You =
G - -Multiply results from (E) x2 Me (18") You =
hopefully these next steps don't confuse anyone. . because I used different photos (of different tee shirts) for each step. ;c)
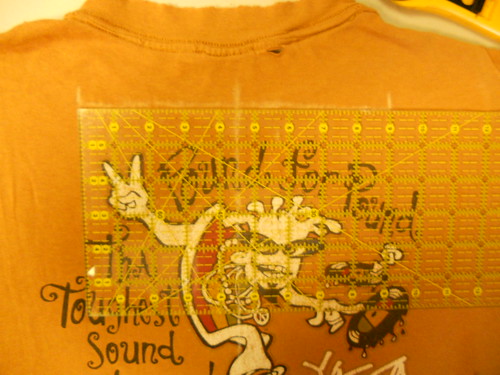
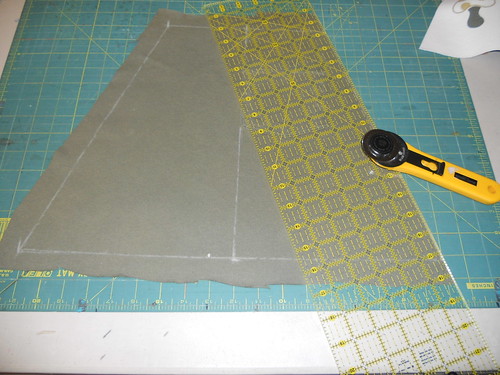
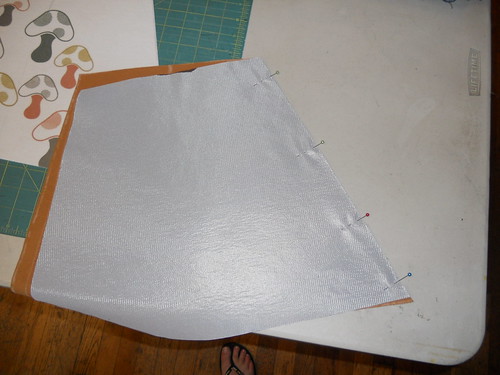
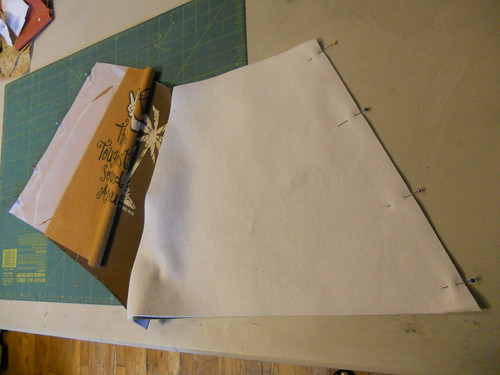
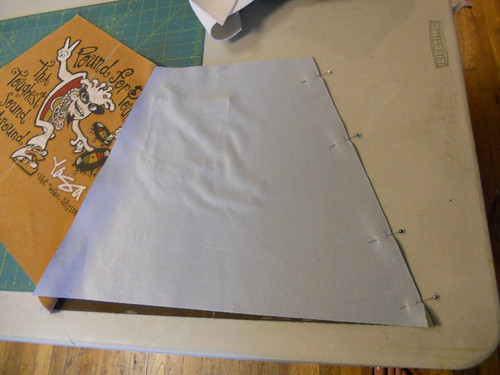
*Use a clear block ruler, or just eyeball it, and try to center your logo, (I am centering between marks 0" and 9" on the ruler) Make a mark at 0" and whatever your result from (E) was. Make an additional mark in the center (Mine was at 4.5")
*Another photo showing the logo centered
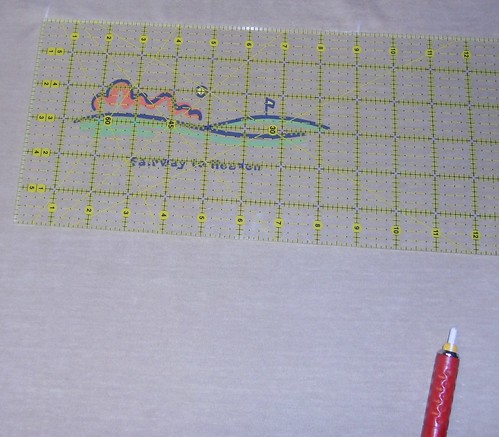
*Line the top of your ruler up with the top line, and make a line going from the center, down to your result from (F) My number was (13")
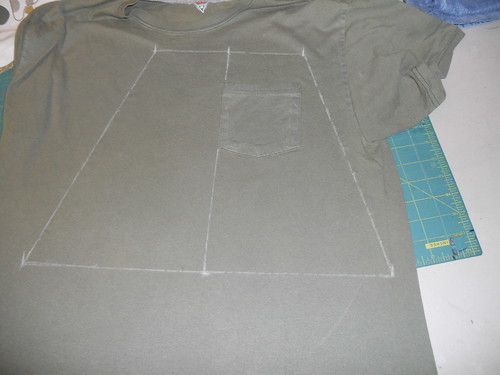
*Next you'll make a line at the bottom, parallel to the line at the top, at the Result from (F) line. So now you can see I have a 9" line on the top, a line going down the center 13" long, and the bottom line is DOUBLE the size of the top line (18".)

*Next you'll connect the sides diagonally.
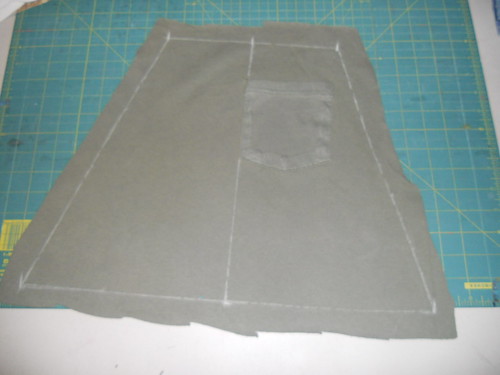
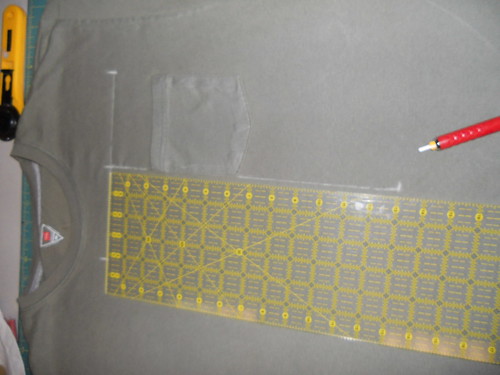
* Cut around the edges of your marked lines. . . give it a rough 1" additional space around the edges
***This next part is optional, but highly recommended if you're using regular old tee shirts. . .especially if they are very worn and hol-y (like mine he he)
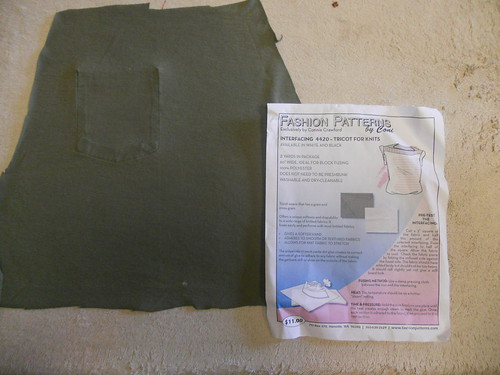
*Grab some fusible interfacing. . I'm using a tricot fusible . . . you could probably use any lightweight fusible for this project though. .
*Lay out your fusible over your rough-cut tees. . Trim fusible so it's not hanging over the edges
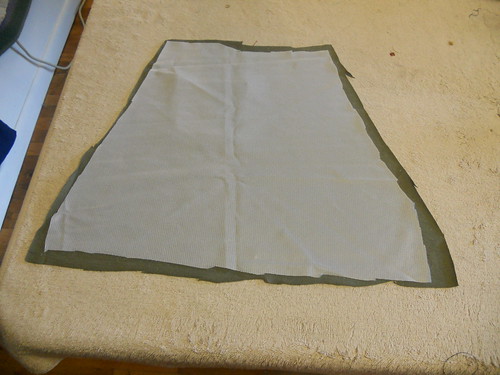
*Before fusing. . cover with an old tee shirt or piece of fabric. . . fusible can be messy when hot . A couple things about fusible interfacing: 1. Mist only your cover fabric with water or use steam. 2. Really PRESS your iron into the fabric, and hold for a few seconds. You can see where you've pressed already because the indention the iron will make in the fabric. When you've pressed all areas, leave it sit for a few minutes. . checking it too early will make it lose it's sticky ;c)
*After your fusible has sufficiently cooled. . you can check it by pulling off the cover fabric, and try to pull some of the fusible off from a corner. If it comes off easily. . REPEAT THE PRESSING PROCESS. . if it's good and stuck. . . continue to the next step ;c)
*Trim excess fabric
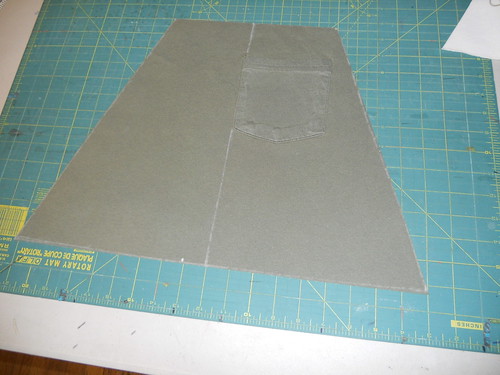
(BTW I'm missing one in this photo. . =cO)
*Take your pieces, RST, and pin
*Continue to pin until all sides are pinned
*Stitch sides together (You could most certainly use a serger if you have one, I used a serge stitch which worked nicely. . but if you're using fusible interfacing, you might be able to get away with a very narrow zig-zag stitch) If using a straight stitch to connect these pieces, I would recommend top-stitching on the outside for extra "security."
*Press Seams to the side
Measure the top circumference of your stitched skirt. Make sure your circumference is LARGER than your result from (A) I got 45.5", and my result from A was 41". If it is not larger, you've done something wrong. . ;c) Email me and I'll help you. .
*Stitch Last Seam RST and Press to the side
*Check to see which shirts/logos you would like to be showing on the front

*I'm choosing the sparkly mushrooms and the "fairway to heaven" logo shirt ;c)
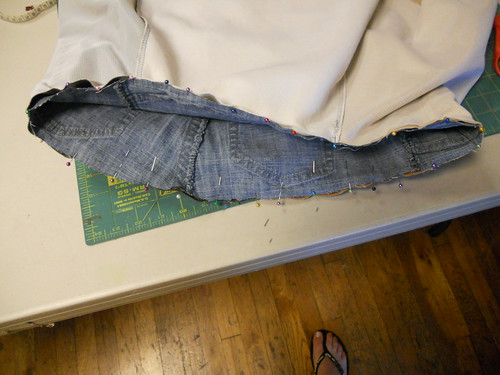
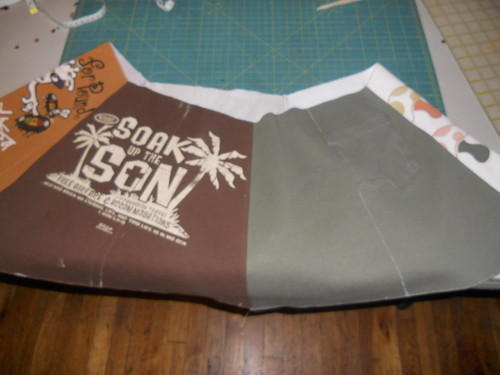
*Flip your sewn tees up around your jeans part, and Pin RST. Since the skirt part will be a tad bigger than your jeans part, you will have some gathers. Just use LOTS of pins and stitch thoroughly. Take your time.
*Try the skirt on to make sure it fits. If it does, Finish by topstitching, or if you have serged your edges. . . Press the seams to one side.
*Optional* Finish the hem area. . .I used a chocolate brown double fold Bias binding that was pre-made from Joanns. . If you DO choose to bind your hem area. . . Trim the areas that are point or in a "V" Shape (the shirts seams) make sure they're flat, so the binding will go on smoothly. Otherwise, I think the funky "V"s give your skirt character ;c)
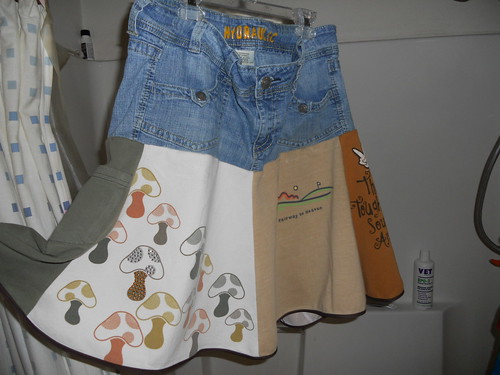
VOILA.. you're done!


For more photos of the finished skirt. . . see my flickr page (click any of the photos )
Good idea! I love, I'll make myself a skirt!
ReplyDeleteCute as a button for the younger set (well...I just had my big 60 so...!!)!
ReplyDelete