
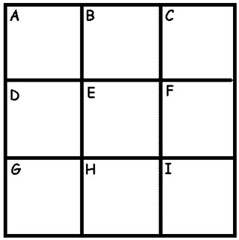
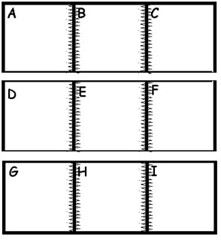
Before sewing, arrange your blocks in a manner that is pleasing to you. Keep them in order by labeling the blocks. Write the letters "A" through "i" in the top left hand corner with chalk.
Click on any of the photos if you would like to view them larger.
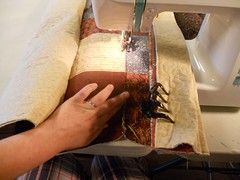
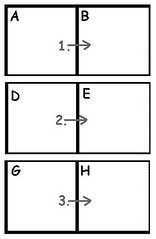
1. Lay out blocks "A" and "B" and butt them next to each other.
2. Pin at each 6" interval like this:
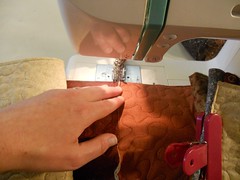
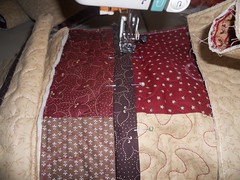
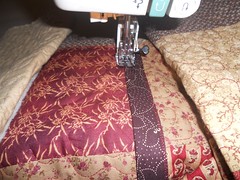
3. Set your machine to a wide zig zag stitch. You can use ANY type of thread for this stitch because it will be covered up later. Clamp the side that will be going through the throat of your sewing machine. This is how it should look before you feed it through the machine for each step:
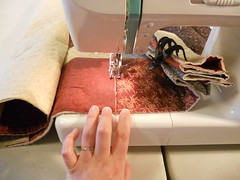
4. Remove the first pin, and place the quilt blocks under the machine foot, and lower the needle into one side.
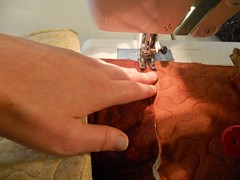
5. Begin to stitch a wide zig zag stitch for about ONE INCH.
6. Remove the next pin, and make sure the next two seams are matched. Stitch until you get ONE INCH past the next seam, easing the two sides together so they match.
*****This is the reason I chose this design for a beginner QAYG tutorial. If you are using a different design, mark your intervals at 6" or so with chalk on both sides. This way you can ease the sides to match gently. It is VERY easy to end up with an extra INCH or so hanging off one side if you're not careful.
8. Repeat this until you are finished stitching together sides "A" and "B"
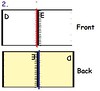
9. Repeat these steps but this time with sides "D" and "E", - and - "G" and "H"
10. Now you will add the 3rd block in the row
"C" gets added to "A/B"
"F" gets added to "D/E" and
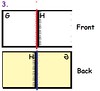
"i" gets added to "G/H"
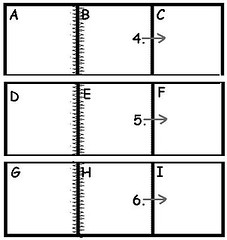
11. Now you should have 3 rows of 3 quilt blocks. "A/B/C", "D/E/F", and "G/H/i"
Part B ~ Add Sashing Strips to Rows
Set your machine up with thread to MATCH the SASHING Fabric.
1. Start with the A/B piece. 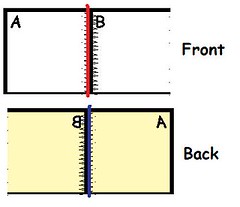 Turn the row over so that the backing is facing you. Lay a strip of folded sashing on one side of the sewn blocks. Pin in place.
Turn the row over so that the backing is facing you. Lay a strip of folded sashing on one side of the sewn blocks. Pin in place.
2. Flip the piece over. Lay another folded sashing strip on the front side. Pin in place, in between the pins from the back side.
3. Flip the piece over and remove the pins from the back side.
4. Turn the piece over again, the top should now be facing you. Place the pins from the back, in between the pins in the front. (The more pins the better.)
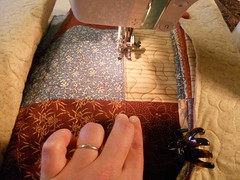
5. Place the piece in the machine and stitch a wide 3/8" seam. Remove the pins as you stitch.
6. Repeat the previous steps for piece D/E, and G/H.
7. Now starting with the A/B/C piece you will add the sashing strips between blocks B/C, E/F, and H/I
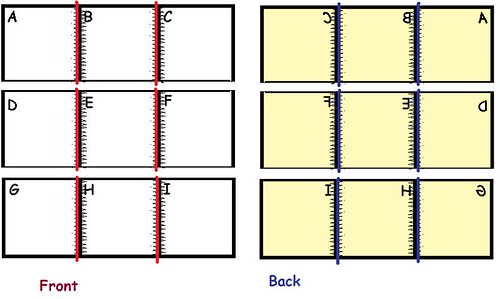
Refer to this grid if you get confused about which side to sew the sashing strip.
Your sashing is now attached to ONE side of BOTH the front and the back of the pieces. Begin the next step with any piece, and you can CHAIN STITCH until you finish with all of the rows. Just keep feeding the 3 rows through until you're done.
8. Starting with the BACK facing you, fold over the folded edge of the sashing to the opposite side of the stitching. Pin in place.
9, Stitch down the folded edge approximately 1/8"
10. Flip piece over so the FRONT is facing you. Do the same for the back sashing. Fold over, pin in place, and stitch 1/8" from the folded edge.
11. the FRONT should now be facing you.. Stitch another row of stitches, as close to the folded edge as possible, or just within the 1/8" line of stitching. This row of stitching is just for security.
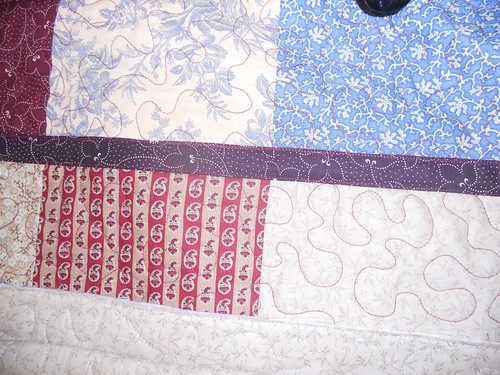
12. For the final stitch you will be doing a TOPSTITCH. (stitching line on the opposite side of your previous stitches - This stitching will go over your seams.)
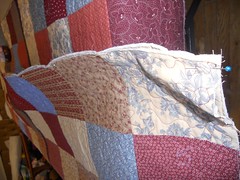
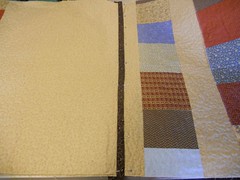
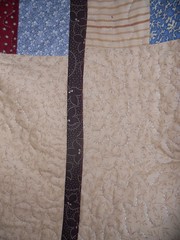
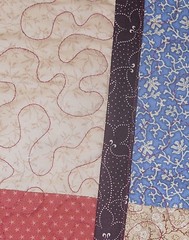
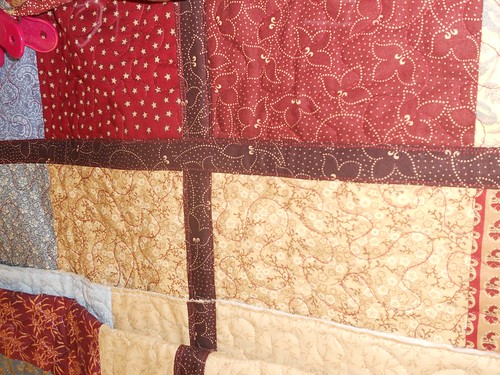
13. This is what it will look like on the front. You should see 2 rows of stitching on ONE side, and one row of stitching on the other side. From the back you will see 3 lines of stitching on one side, and one line of stitches on the other side.
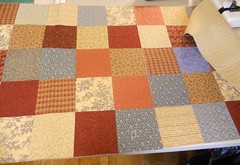
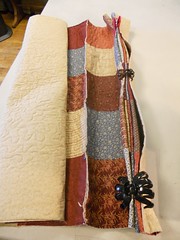
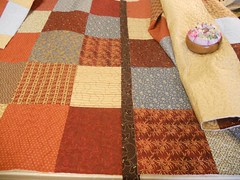
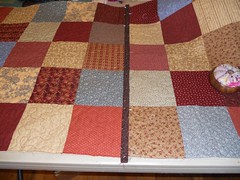
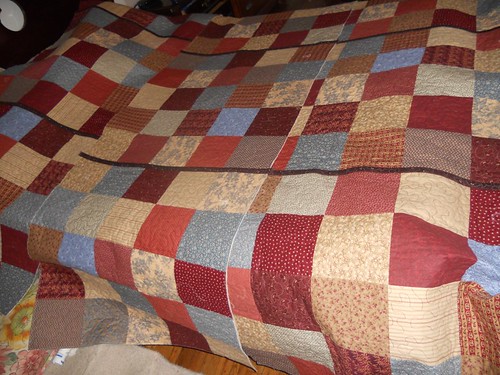
This is the 3 completed rows of stitching laid out on the bed:
Part C ~ Connecting the Rows
Now you are going to join the rows into columns. This is done exactly like the previous steps were done. Start by trimming any excess sashing.
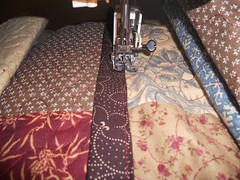
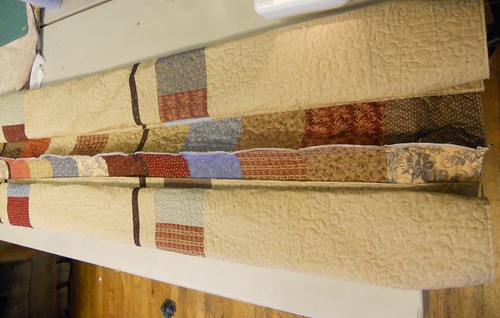
1. Lay out row A/B/C and butt it up next to D/E/F . Fold in the edges, and clamp the side that will be fed through your sewing machine. Start by Zig-zagging, and THEN add your sashing as in previous steps. This is what it will look like pinned and ready for your Zig-Zag Stitch.
2. Take care to not only match up 6" squares/intervals, but also the sashings.
3. Repeat the previous steps but this time you're joining the D/E/F side to G/H/i
No comments:
Post a Comment