Google Analytics

Showing posts with label tee-shirt quilt. Show all posts

Sunday, October 30, 2011

Halloween and Owl Baby Quilt


With minutes to spare, I finished mine and DH's Halloween costumes. We went as the Yip-Yip aliens from Sesame Street. We found the INSTRUCTABLE but made a few adjustments. First of all, we stitched up the sides for a better fit, we used a baseball cap turned around backwards and we also added a zipper on the mouth piece. I felt the zipper was a necessary addition for the consumption of adult beverages, BUT, we found that there was plenty of room INSIDE the costume for hands, beer, and whatever else! ;c) It was nice to unzip the mouth piece so that you could have a slightly better view of the ground when walking where there was not much lighting.


Before the Halloween party, there was my friend's Baby Shower. My friend Tiffany soon will be the mommy of "unbornbabynoname." It's always the correct assumption that anytime a gift is necessary, the gift will aLWAYS be . . a quilt. I would have liked to have been able to personalize the quilt . . but since the baby still has no name, I made a little quilt with an owl applique on it. She likes owls.. we both do!


I just used scraps of fabric to make up this little quilt. I was going for a more "modern" look, but after the applique was added it leans more to the traditional side. . my quilts seem to do that no matter how hard I try otherwise!


I quilted the background (white) areas with my version of McTavishing. . I really need a name for this stitch since it is far different than how the amazing Karen does hers.
I quilted the colored blocks with alternating feather plumes.
I went ahead and layered the quilt sandwich, fused the applique shapes, and then just free-motion stitched down the applique pieces with a narrow zig-zag stitch. My goal was to do the 3 layers and then add minky to the back as a 4th layer. THIS DID NOT WORK OUT AT ALL! I pinned them RST and stitched around the edges leaving a whole to flip it right side out. The edges turned out all lumpy and it was just way too thick. I do'nt know what I was actually thinking.
Oh well, it was a learning experience. So this is what the back looks like. . NOT what I originally planned, and NOT the prettiest, but it still has an interesting effect.


I might come back and do a tutorial on this little quilt in a few days - Right now I'm trying to figure out how to add a .pdf file to blogger. =c/ Without using scribd (i do not care for that program at all.)


One more thing - I just finished another Tee-shirt quilt for my friend Beth. She wanted to use up all of her college and high school running shirts. They were alot of fun to quilt around! ;c)

Saturday, August 13, 2011

Rachel's Tee-Shirt Quilt

I finished my sample tee-shirt quilt for the class I will be hopefully teaching very soon.
My dear friend-of-the-family Rachel was kind enough to let me use HER tee-shirts as a sample for class. She will of course receive her finished quilt AFTER the class has been completed ;c)

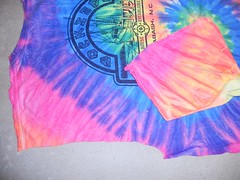
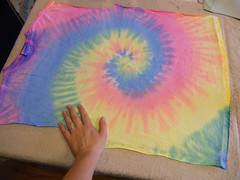
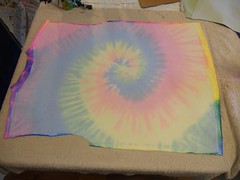
She had a very nice mix of tee's - alot of color! I think every tee-shirt quilt should have at least ONE tie-dye ;c)

So here it is:
This is the front/top of the quilt.


For the back I pieced together some pretty Amy Butler Teal-colored fabrics.


Closeup of one of the "blocks" -


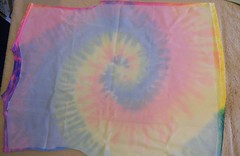
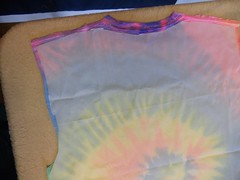
Closeup of the tie-dyed block -


Closeup of another one of the blocks -


I call this style of tee-shirt quilt "tetris" style. which means it does NOT use uniform-sized blocks and it does NOT use sashing.

If I get enough interest, I might offer a tutorial on how to do this . . but not until AFTER the class is over... ;c)

The tutorial for how to prepare your tee-shirts for a tee-shirt quilt can be found HERE.
~~~~~~~~~~~~~~~~~~~~~~~~~~~~~~~~~~~~~~~~~~~~~~~~~~~~~~~~`

What else am I working on??? My friend JRB has put me to "work" making some beautiful totes as seen HERE. Of course I can't consider this "WORK" at all because I absolutely LOVE it!!

Also on my TODO list - I'm making a quilt as a secret gift for a friend of mine and his wife but I can't say much about that at this point ;c) TOP SECRET.

One other project that is in the works right now is "Lucia's Memory Quilt" I am making a snowball signature quilt for a lady who is adopting a daughter from Mexico. She is raising funds for the adoption fees and this quilt is one way we can help. There are several sponsorship levels and options. You can choose to just have your signature in one block, a Bible verse, or even a PHOTO. If you would like to be a part of this very special project you can go see Tracy on her blog HERE.

Sunday, August 7, 2011

Preparing Shirts for Tee Shirt Quilt

Here is a small photo tutorial on how to prepare your tee-shirts for a tee-shirt quilt.
I am in the process of making a tee-shirt quilt class available and want for my students to be able to finish the whole quilt IN CLASS. In order for us to finish the whole quilt, you will have to do your fusing at home. This is not a difficult process at all, just time consuming.

What you will need:
*1 bolt of of Pellon Fusible Stabilizer (Available at Jo-Ann's for $9.99 - look for a coupon)
Pellon Interfacing Lightweight Fusible 40 YD BOLT White

*Tee-Shirts
*Scissors
*Iron
*Spray bottle with water
*1 yard of cotton quilting fabric (you can just use a scrap piece, this is just to protect your iron)
*An Ironing board or several towels to protect your ironing surface


~~Click on any of the photos below to view them larger~~~
**Make sure to wash all of your tee shirts thoroughly with hot water especially if they are new. Do not add any fabric softener or spray starch.**

Cutting the Shirts:
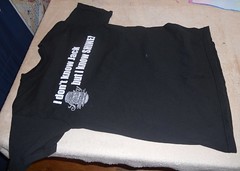
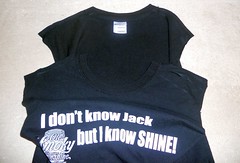
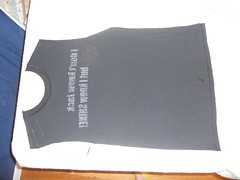
1. Lay out your Tee, and smooth it out.
1a

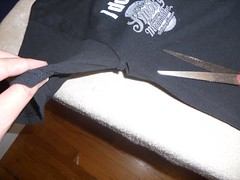
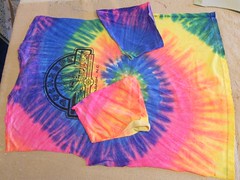
2. Make a small slit in the armpit of one of the sleeves.
1b

3. Stick your scissors in the slit and begin cutting - cut just INSIDE the seam until you have the whole arm part completely cut off.
1c

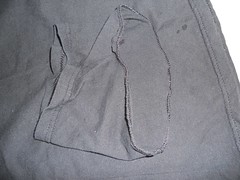
4. Here you can see where the seam is cutoff WITH the arm piece of the tee.
1d 1v

5. Repeat this step for the other Arm piece - your tee should now look like this:
1e 1u

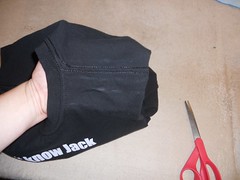
6. Pick up your shirt like this, you will now be cutting the shirt along the shoulder seam
1f

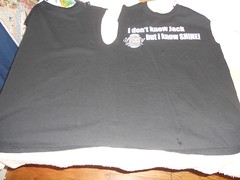
7. Cut along Both shoulder seams, it doesn't matter which side the seam is on - you can even cut those off if you wish.
1g

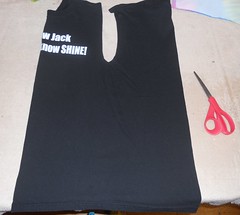
8. Carefully fold your shirt in half lengthwise to find the side seam. If there is no side seam try to just eyeball it.
1h

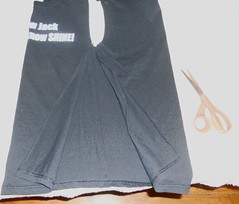
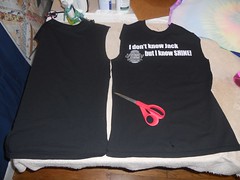
9. Cut along the side seam and repeat for the opposite side.
1i 1j 1k

Fusing the Shirts:
~~You will only be using the side of the shirt that has a logo on it. Sometimes there will be a logo on the front AND back, in that case you will fuse BOTH sides. ~~

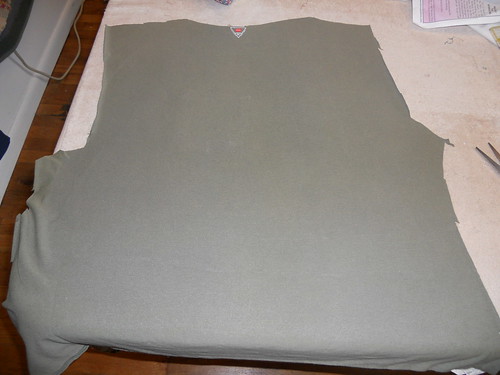
1. Lay out one of your tee shirts, Right-side down, WRONG side facing you. Smooth out your shirt with your hands.
1w 1l

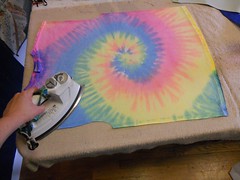
2. Get out any wrinkles by PRESSING with your iron on medium-high heat.
***You will not be IRONING at all, what you are going to be doing is PRESSING. Start in the center of your shirt and press down slightly with your iron. Press for a few seconds and then pick your iron all the way up, and lay it down next to the indention you just left. You will be able to see the indention the iron made previously, and so you will be able to see where you have already pressed and what has NOT been pressed. Please try to avoid ironing, (sliding the iron back and forth over your tee shirt) we are working with knits which are easily stretched. Once the woven stabilizer is fused, it will keep the tee shirt from stretching. If the shirt is already stretched when the stabilizer is fused, it will be stretched permanently. . . which is not a good look! ;c)
1x 1m

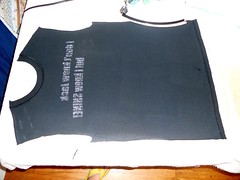
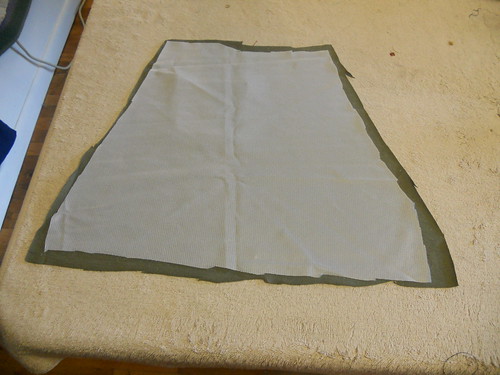
3. Place the stabilizer *rough* side down on your tee shirt. Cut the stabilizer to fit just inside your tee-shirt, because you don't want any fusible on your ironing surface ;c)
1y 1n 1z 2a

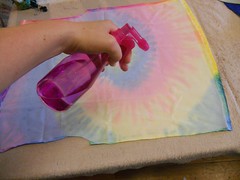
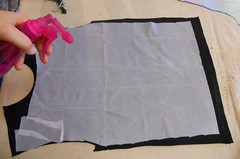
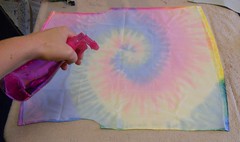
4. Spray a generous amount of water over top of the stabilizer. You want it damp but not soaking wet. Remember that if it doesn't stick the first time, you can just go over it again.
1o 2b 2c

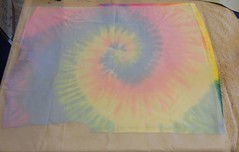
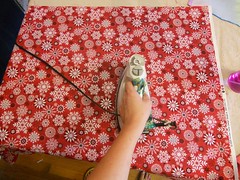
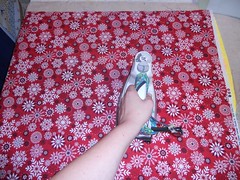
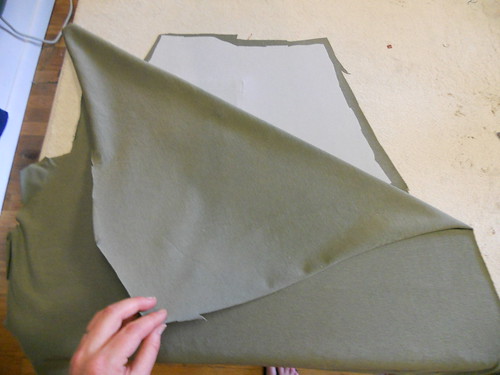
5. Lay a piece of cotton quilting fabric over top of your work, wrong side down. Press your fabric like in step 2 above. This time you will want to use medium-high heat, and press each section for at least 5 seconds.
1p 2d

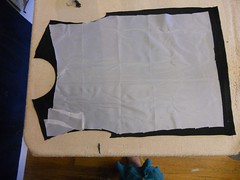
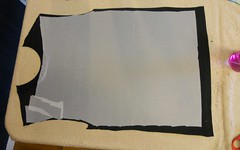
6. Now your piece should be nice and smooth and look a little something like this:
1q 2e
*BTW, you can use scraps of stabilizer if your piece doesn't fit the whole shirt. Just overlap the scraps just a bit, and it will be just fine.

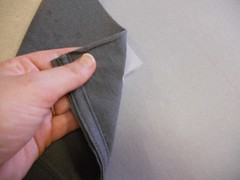
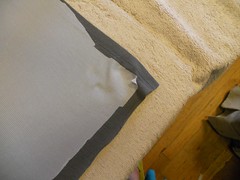
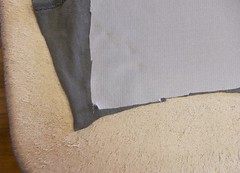
7. Check all corners of your stabilizer to make sure they are all thoroughly fused. Pull gently on the stabilizer - if it comes off easily like this - then you need to re-fuse. Spray a little water, cover and press again.
1r

8. If your stabilizer doesn't come off - or tries to shred like this - you are finished.
1s 1t

If you have any questions - feel free to email me - or ask in the comments section, I will respond ASAP.

Friday, May 27, 2011

Deconstructed Tee Skirt Tutorial

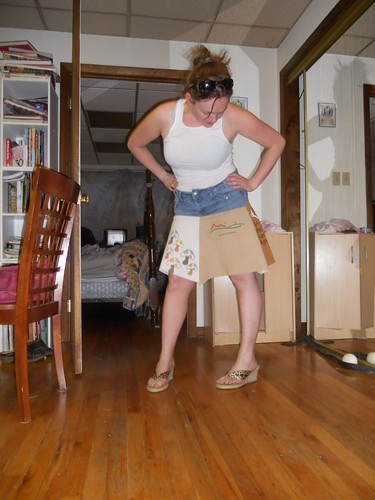
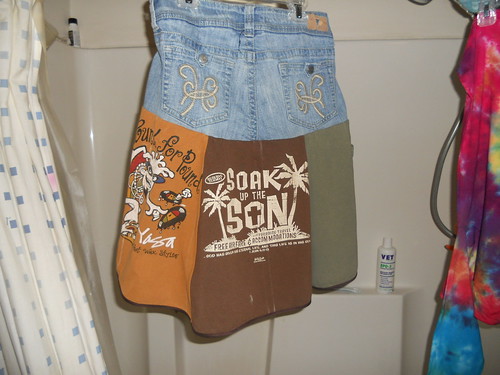
One of the 1st items I crafted a looooong time ago was a deconstructed skirt project. . . Those skirts are still in rotation today and I LOVE them! Thank goodness they're coming back in style.
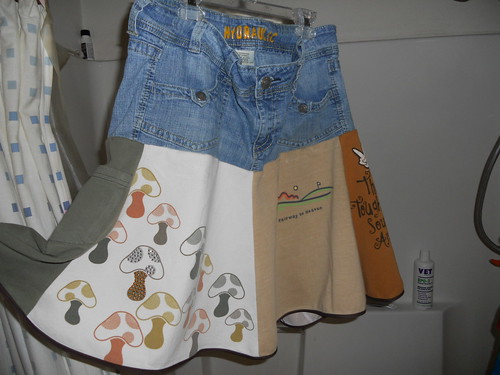
Here's a Tute for a very Basic version of my Decon Tee-skirt pattern.

DSCN0335

I am offering this pattern to you FREE to keep old clothes out of landfills and to help our Mother Earth. Please DO NOT SELL this pattern, and DO NOT SELL skirts you have made from this pattern. Please DO Make or Donate as many as you wish! ...and please. .if you do decide to make one. . by all means share a photo with me! I would also love to share the photo with everyone here on this blog!
If you have any questions, just leave them in the comments section below and I will answer them ASAP =cD

YOU WILL NEED:
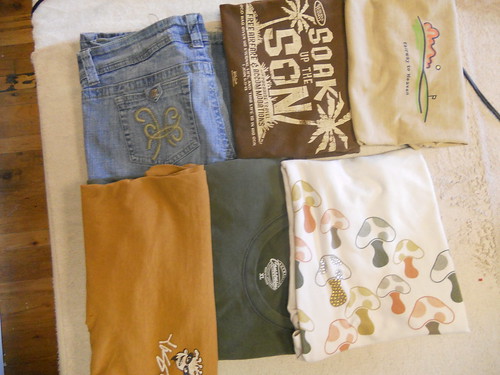
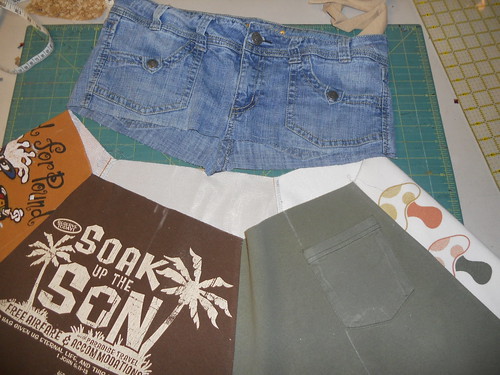
1. One Pair of old jeans/Skirt/Shorts of a sturdy material i.e., cordoroy, or denim (Because of this design, you can use a pair of jeans that are 1 or 2 sizes too small )
2. A few old Shirts, can be Tee-shirts or Woven, doesn't matter (I used 5 total)
3. Good, Sharp pair of scissors
4. Iron
5. Sewing Machine (you could do this by hand but it would be a real pain in the *****)
6. Measuring Tape
7. Chalk (or other washable marking tool)
9. Block Ruler
10. Thread/Pins/Needles/etc.,

Optional (but highly recommended):
A friend to help with measurements
Starch
Rotary Cutter and Self-healing mat
Stretch Needles (great for sewing together tee-shirts)
Pre-made Bias binding (for hem)

DSCN0233
*Press and Starch all your garments
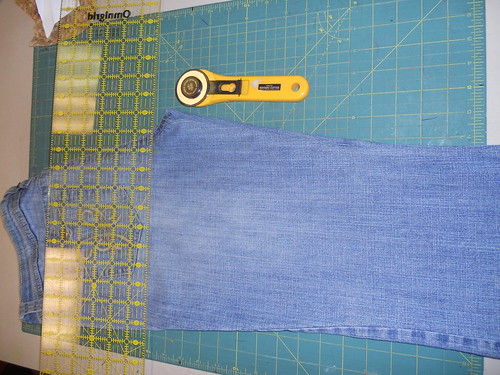
*Fold your jeans in half by grabbing the crotch in the back with your finger, and then keeping the waiste line straight. Lay your now folded jeans on your cutting mat , keeping the grain line of the jeans parallel to the lines on your cutting board.
DSCN0237
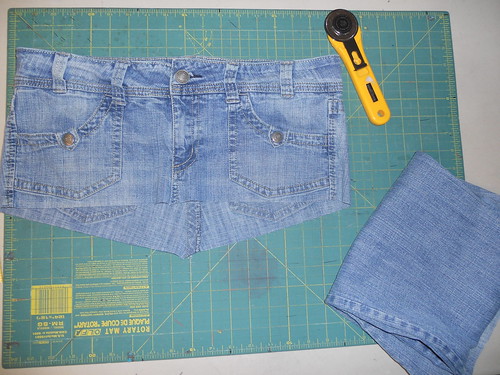
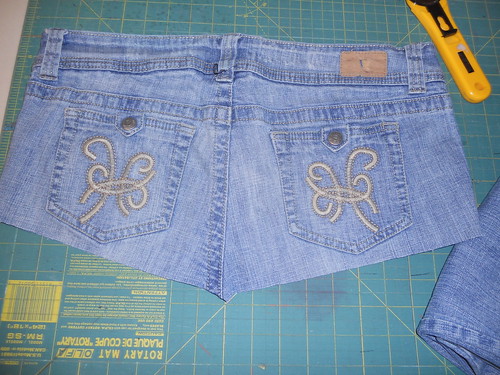
* Make a straight-across cut, right below the zipper or right above the crotch area - try to make your cut perpendicular to the grain lines.
DSCN0238
*Set your excess jeans fabric aside. . . . for another project ;c)
DSCN0239
DSCN0240
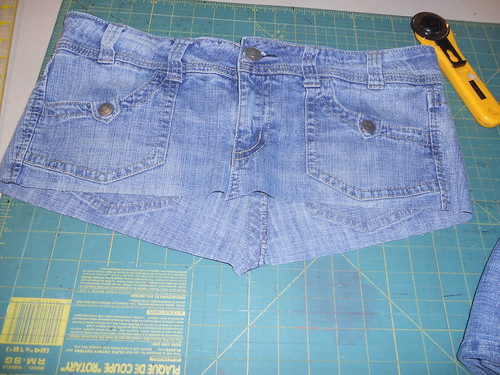
* With your scissors, straighten out the Center-Front and Center-Back seam areas. In this photo you can see where it goes in a "V". . . just take your scissors and snip that off - You don't want any Angles when you start attaching your shirts.
DSCN0242
*Staystitch along the edge to prevent fraying.
DSCN0244
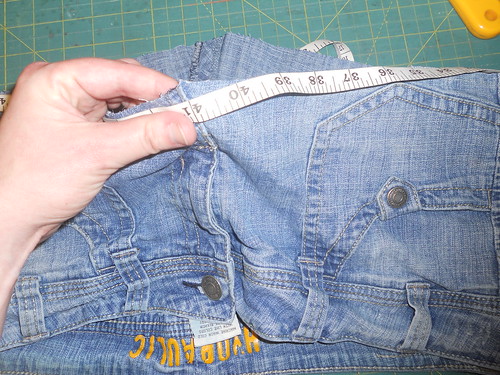
*Starting from the Center Front Seam, Measure all around the circumfrence of the cut-off jeans. WRITE THIS NUMBER DOWN (My number was 41)
DSCN0250
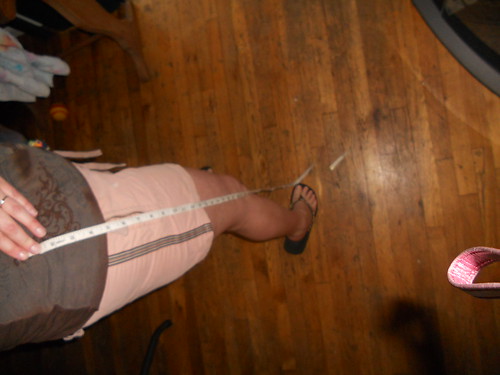
*Starting at your NATURAL Waiste, measure down your leg to where you want the skirt (bottom/hem) to end. WRITE THIS NUMBER DOWN I like my skirts to end right above the knee. For me this number was 21. (About your natural waiste: Girls, this is not your coin slot, this is the smallest area around your middle)
DSCN0251
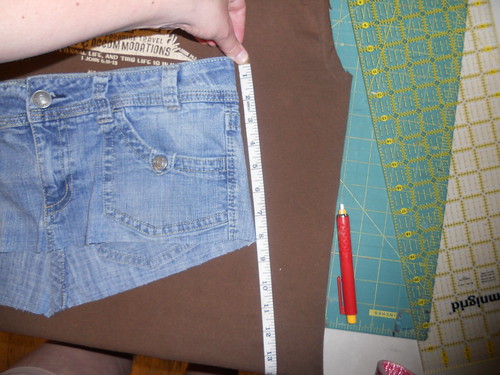
*Measure one of the side seams on your cut jeans from Waiste to Cut. WRITE THIS NUMBER DOWN (For me this number was 8)
*Now for some calculat'n ;c)

A - - Cut Jeans Circumference: Me (41") You =
B - -Cut Jeans Side Seam: Me (8") You =
C - -Length from Waiste to Knee, or where you want your hem to be: Me ( 21") You =
D - -How many shirts do you have? Me (5) You =
E - -Circumference (41") /Shirts (5) = Me 8.2 rounded to the nearest whole number is (9"**) You =
F - -Length of Hem (21") - Side Seam (8") = Me (13") You =
G - -Multiply results from (E) x2 Me (18") You =


hopefully these next steps don't confuse anyone. . because I used different photos (of different tee shirts) for each step. ;c)

DSCN0265

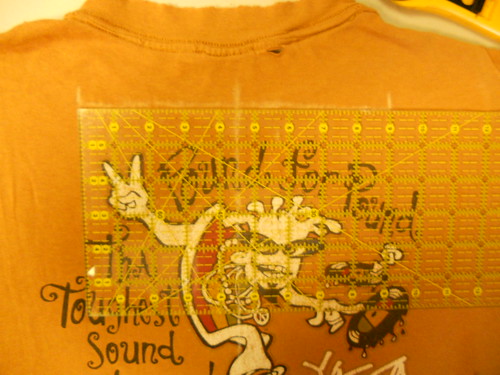
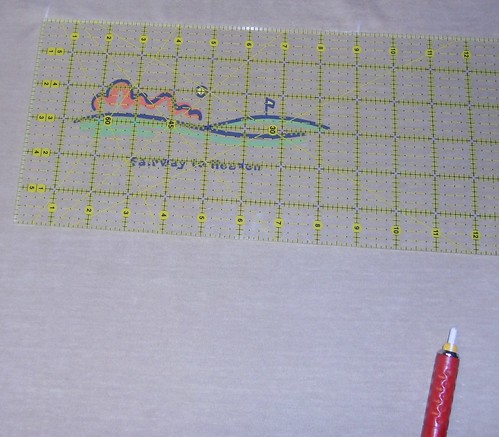
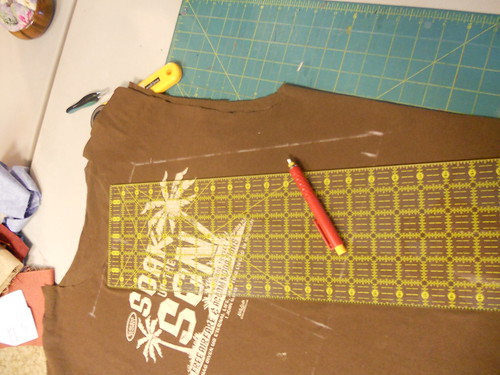
*Use a clear block ruler, or just eyeball it, and try to center your logo, (I am centering between marks 0" and 9" on the ruler) Make a mark at 0" and whatever your result from (E) was. Make an additional mark in the center (Mine was at 4.5")
DSCN0291
*Another photo showing the logo centered
DSCN0269
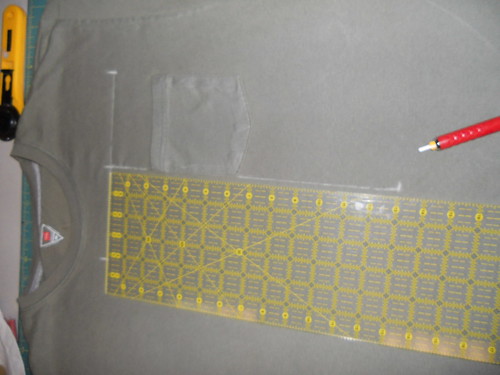
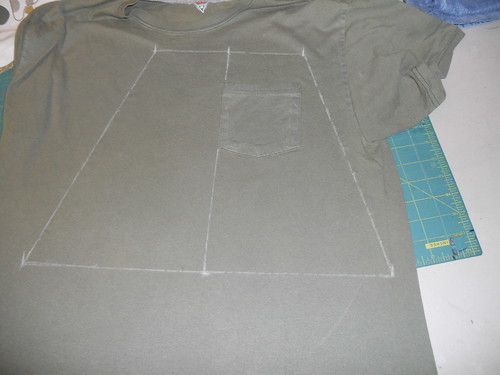
*Line the top of your ruler up with the top line, and make a line going from the center, down to your result from (F) My number was (13")
DSCN0271
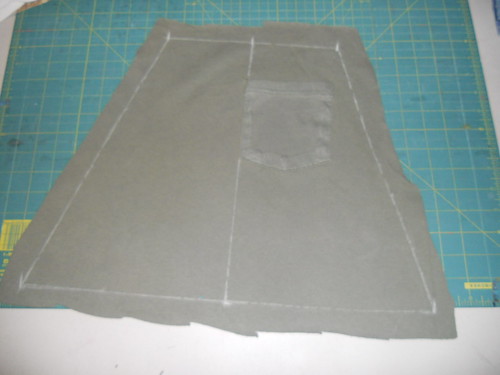
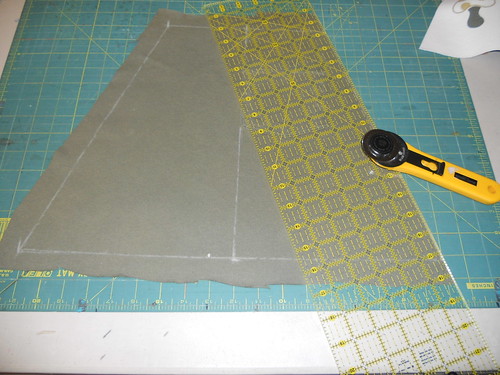
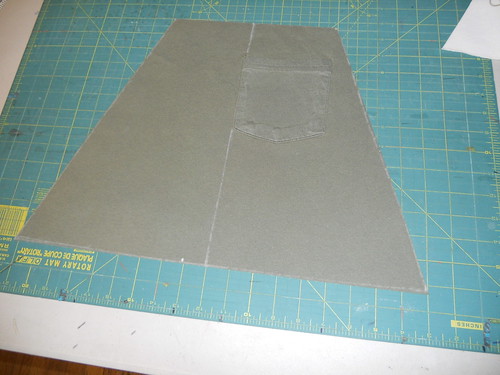
*Next you'll make a line at the bottom, parallel to the line at the top, at the Result from (F) line. So now you can see I have a 9" line on the top, a line going down the center 13" long, and the bottom line is DOUBLE the size of the top line (18".)
DSCN0262
*Next you'll connect the sides diagonally.
DSCN0272
* Cut around the edges of your marked lines. . . give it a rough 1" additional space around the edges
***This next part is optional, but highly recommended if you're using regular old tee shirts. . .especially if they are very worn and hol-y (like mine he he)
DSCN0273
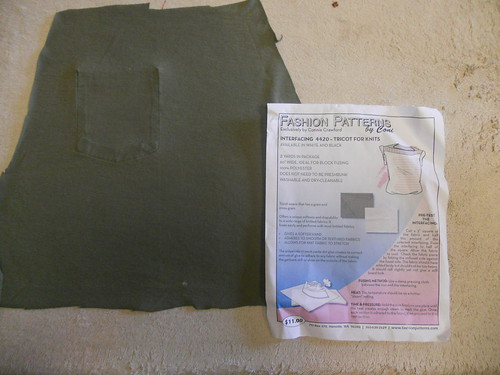
*Grab some fusible interfacing. . I'm using a tricot fusible . . . you could probably use any lightweight fusible for this project though. .
DSCN0274
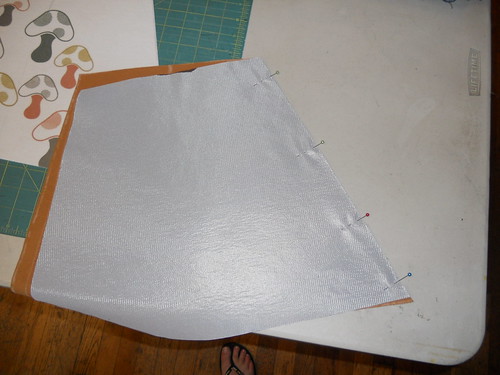
*Lay out your fusible over your rough-cut tees. . Trim fusible so it's not hanging over the edges
DSCN0275
*Before fusing. . cover with an old tee shirt or piece of fabric. . . fusible can be messy when hot . A couple things about fusible interfacing: 1. Mist only your cover fabric with water or use steam. 2. Really PRESS your iron into the fabric, and hold for a few seconds. You can see where you've pressed already because the indention the iron will make in the fabric. When you've pressed all areas, leave it sit for a few minutes. . checking it too early will make it lose it's sticky ;c)
DSCN0276
*After your fusible has sufficiently cooled. . you can check it by pulling off the cover fabric, and try to pull some of the fusible off from a corner. If it comes off easily. . REPEAT THE PRESSING PROCESS. . if it's good and stuck. . . continue to the next step ;c)
DSCN0282
*Trim excess fabric
DSCN0283
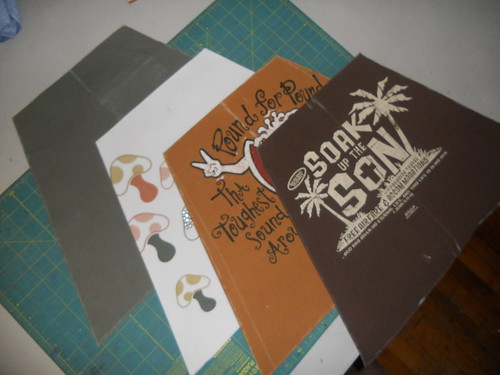
DSCN0285
(BTW I'm missing one in this photo. . =cO)
DSCN0286
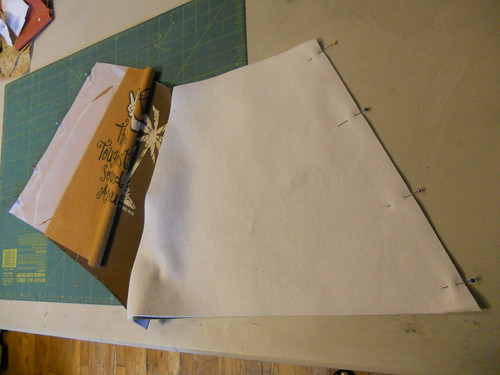
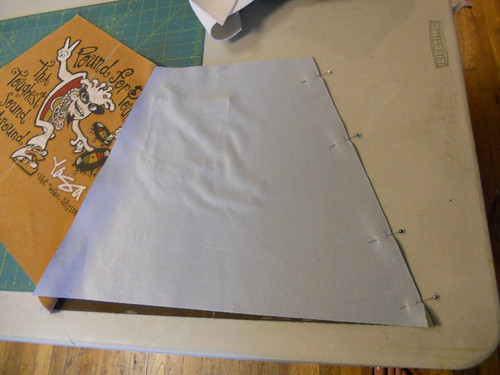
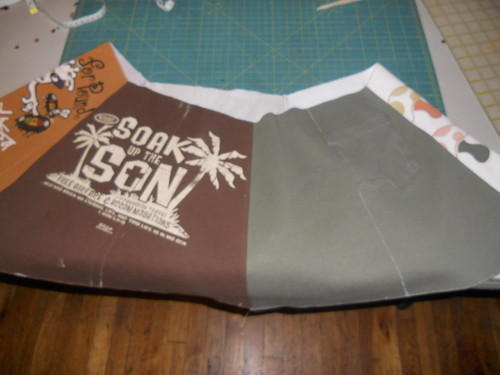
*Take your pieces, RST, and pin
DSCN0288
*Continue to pin until all sides are pinned
DSCN0287
*Stitch sides together (You could most certainly use a serger if you have one, I used a serge stitch which worked nicely. . but if you're using fusible interfacing, you might be able to get away with a very narrow zig-zag stitch) If using a straight stitch to connect these pieces, I would recommend top-stitching on the outside for extra "security."
DSCN0293
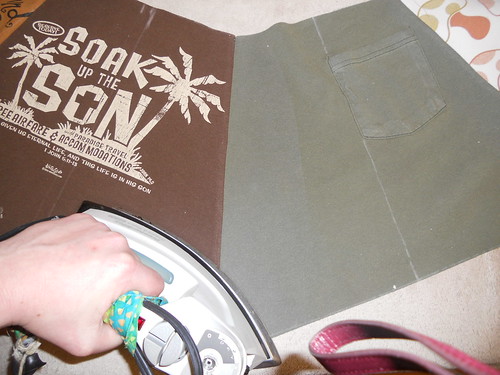
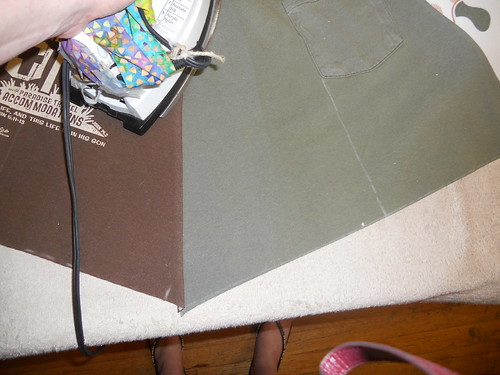
*Press Seams to the side
DSCN0294
DSCN0297
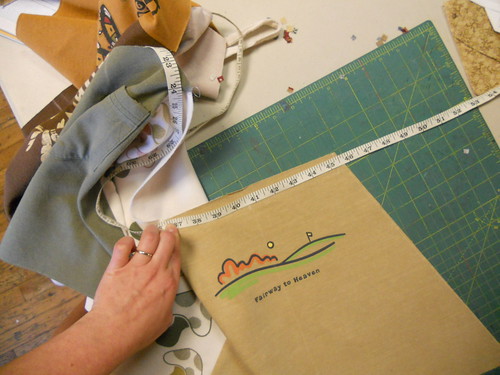
Measure the top circumference of your stitched skirt. Make sure your circumference is LARGER than your result from (A) I got 45.5", and my result from A was 41". If it is not larger, you've done something wrong. . ;c) Email me and I'll help you. .
*Stitch Last Seam RST and Press to the side
DSCN0298
*Check to see which shirts/logos you would like to be showing on the front
DSCN0300
DSCN0301
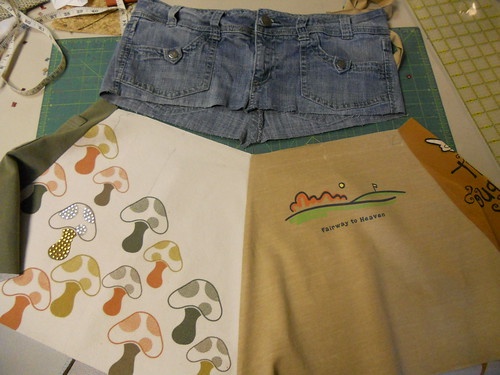
*I'm choosing the sparkly mushrooms and the "fairway to heaven" logo shirt ;c)
DSCN0302
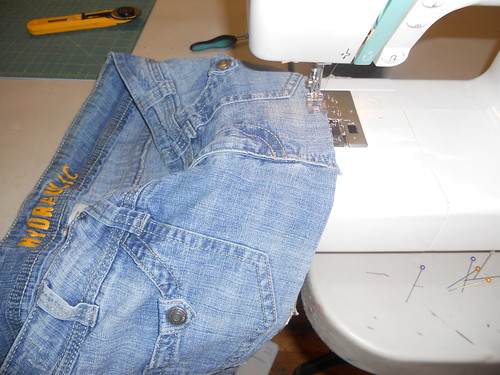
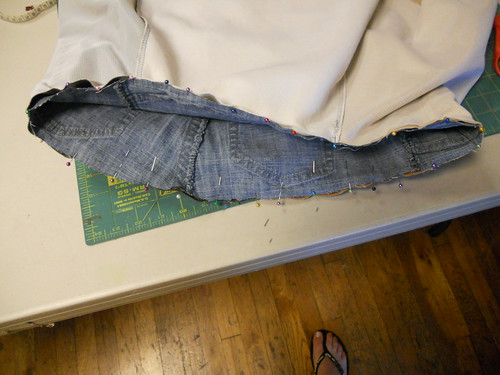
*Flip your sewn tees up around your jeans part, and Pin RST. Since the skirt part will be a tad bigger than your jeans part, you will have some gathers. Just use LOTS of pins and stitch thoroughly. Take your time.
*Try the skirt on to make sure it fits. If it does, Finish by topstitching, or if you have serged your edges. . . Press the seams to one side.
*Optional* Finish the hem area. . .I used a chocolate brown double fold Bias binding that was pre-made from Joanns. . If you DO choose to bind your hem area. . . Trim the areas that are point or in a "V" Shape (the shirts seams) make sure they're flat, so the binding will go on smoothly. Otherwise, I think the funky "V"s give your skirt character ;c)
VOILA.. you're done!

5
DSCN0334
For more photos of the finished skirt. . . see my flickr page (click any of the photos )