Google Analytics

Sunday, September 25, 2011

Bias Tape Applique

I'm working on a quilt right now that is going to require a bit of bias strip applique. . or "Celtic" applique. I've made lots of bias tape - by HAND, but it's usually no smaller than 1" wide. This quilt requires a bit more delicate bias tape. Right now it looks like I will need the bias tape to finish at no larger than 1/2".
So, today I've been looking around for different techniques to do this. Right now it looks like the easiest way would be to go out and purchase a Bias Tape MAKER.

THIS BLOG has a bunch of great tips, most of them being done by hand stitching and basting. I might try one of her techniques but just use my machine and add some stablizer behind it.
Not only am I searching for a method that would work well with MACHINE stitches, but that also won't be a lot of fabric waste. Most of these methods work well if you're using at least 1/2 yard of fabric. I would like a method where you can work from Fat Quarters or less.
I need 21 bias applique strips that will be in the shape of hearts that are no larger than 5" wide. I also want the hearts to be semi "scrappy" and don't want to cut into 5 different pieces of yardage. This seems very wasteful. I may not have another choice!

THIS BLOG shows you how to use bias BARS to make bias strips for applique. I think this would work well also. I'm STILL Trying to avoid breaking down and PURCHASING anything ;c) Yes I am THAT cheap.

How do you do bias applique? Does anyone have any cheap/frugal methods for doing this? That don't waste alot of fabric and work well with machine stitching? Please share your tips with me in the comments section I would greatly appreciate it!!!

Thursday, September 15, 2011

Double Delight Done!!


Okay, so here are the photos of my Double Delight.
I pulled out all my neutrals, greens, and a few darkish blues and reds. For the constant color, Bonnie's "Cheddar" color, I used a gold print. The gold print included those dark blues, reds, and evergreen greens.
For the small inner border I used scrappy reds for the top, and scrappy greens for the Back. I used the same blue floral print for both Top and Back. The photographs make the blue look a little more BLUE it seems than what it looks like in real life.

Like I said previously, I constructed this quilt totally using the QAYG method. I have written a tutorial on how I do QAYG and it can be found in the TABS section . . just look UP! ;c)


And a couple more closeups -
DD9b
I did these little flower quilt designs with NO FMQ. . just my regular straight stitch. . . yes. . .
DD9a
I don't know what I was thinking with the quilting on the setting triangles - spiderweb quilting maybe?? LOL
DD9f
Some absolutely horrible fabrics for the back setting triangles. . .
The back has a 'butterfly' theme I guess . . LOL.
DD9e
The fabric I used for the 9patch blocks was this pretty autumn fabric.

When I said this was totally scrappy. . . I MEANT it!!! ;c)
Bonnie should be so proud of me!!!
AND the quilt is BIG . . I know she approves of that too! LOL
DD9d
I had, and STILL have, TONS of green fabric. . . So I used green throughout this quilt.
oooo. . . I just thought of something1!
GREEN BEAN DELIGHT!!! THATS IT!!!!

***Update. . . someone suggested a better name for this quilt
"Double Trouble"
LOL

Wednesday, September 14, 2011

Finally Done with DD

Just about an hour ago I put the finishing stitches on the binding of my LONGGGGG overdue, UFO'd Double Delight Quilt!!! To be quite frank, this quilt has been absolute HELL. Nothing to do with Bonnie, or her pattern. In fact, this pattern was quite wonderful. . . as is ALL her designs. However, I started the quilt with an old Singer (el-cheapo, crappo) sewing machine. I did not have the high-tech fancy stuff and was unable to free-motion quilt back then. I got so frustrated with the thing I stuck it in a bag for a year. . or two. It's done now though, it took 3 whole, long, FULL days of doing the borders.
I think my frustration had to do with #1) The crappy sewing machine and #2) Doing QAYG with an ON-POINT setting. Yeah, can you even wrap your brain around that??? It was just problems galore.
Oh well, it's done now. NOO I will not be selling this or gifting this. THIS quilt will have a new home in my usual gallery of quilts. . . aka MOMS house. ;cD
Quilts just look so much better at her house rather than in my musty old apartment. =cP

After I sweated and cussed through the finishing steps of this gigantic quilt this evening. . . I stuck it in the washing machine. After several months of being cooped up in a bag with little to no attention. . it needed a good cleaning and airing out.
I will have photos for ya tomorrow. . . stay tuned ;c)

PS - what shall I name her??? I do believe the name should have either the word "Double" OR "Delight". . NOT both . . and have something to do with the painstaking process this has been for me.
Blood Sweat and Tears Delight?
Double Sweat and Tears?
Double Curse?
Cursing Delight?

Ah well, I suppose you should actually SEE the quilt before you can actually assist with a name for it.

Thursday, September 8, 2011

Double Delight UFO progress etc.,

As I mentioned before, I have two "big" projects coming. Both of them are memory quilts (quilts that will utilize inkjet printing on fabric.) I have finished all my current-running projects and didn't want to start anything new or "big" because I knew these two quilts would require my FULL attention and were going to be started very soon.
So as I'm here, twittling my thumbs in a way. I can't start anything new, so I've sorta been FORCED to dig into my UFO pile. . .which everyone knows is a GOOD thing. I knew I would dig these things out ONE day. . and the day has come!!!

UFO #1: String Quilt.
Remember the string blocks we swapped on quiltvilleswap yahoo group? I paired these, with my (now ufo'd) RRCB neutral string blocks and stitched these into an odd top. I say this is odd because there are many more neutral blocks than colored ones. I don't have a photo of this just yet, but will have very soon and will share it ASAP.

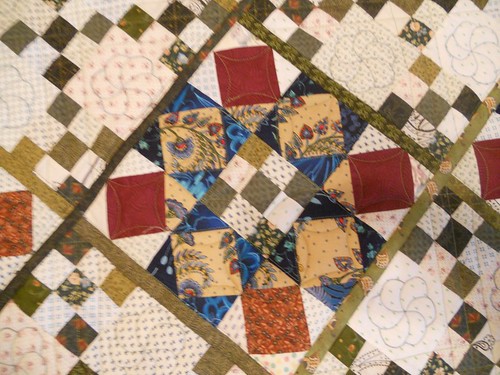
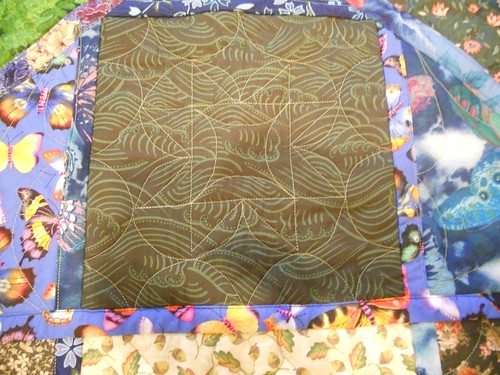
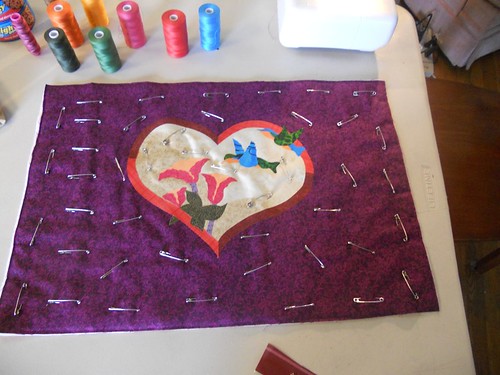
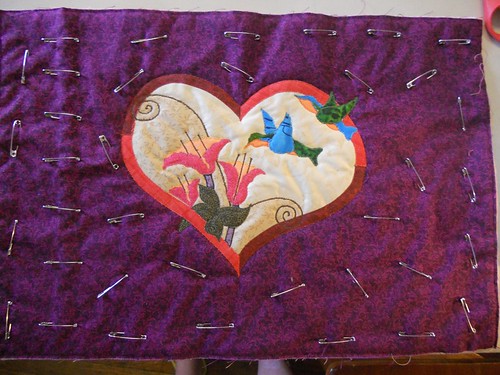
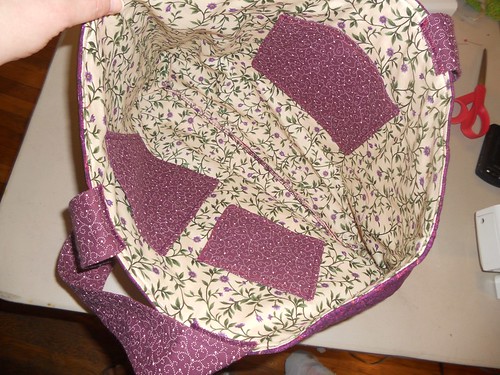
UFO #2: Double Delight.
I pulled this baby out today, and this is what I saw.


I was constructing this quilt using the QAYG method (as usual) and since it was on-point it was very INTERESTING to put together... Here you can see that all my blocks were put together in rows, and the sashing already added. All I had to do was put the rows together and the center would be done.


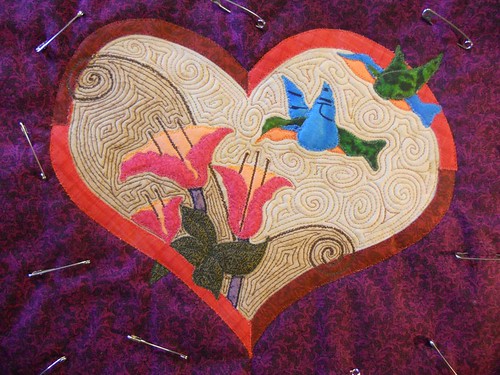
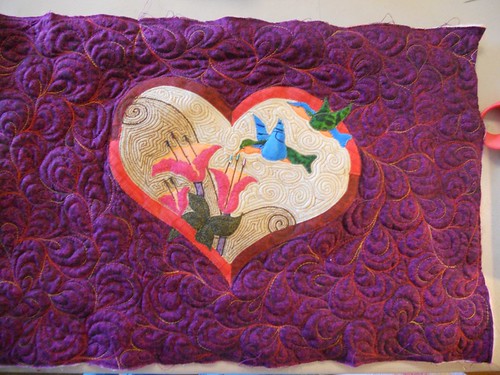
I don't know why I UFOd this in the first place. Yes, I just used UFO as a verb. I was SO CLOSE. So close in fact, that I finished the whole "center" of the quilt in just a couple hours!!

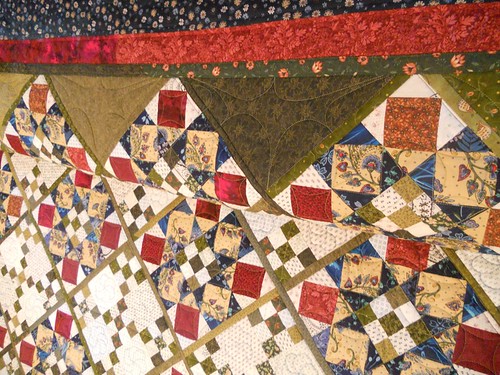
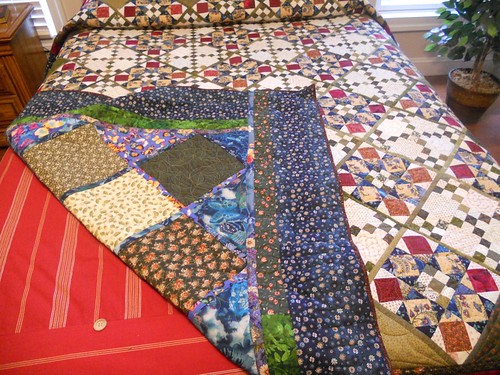
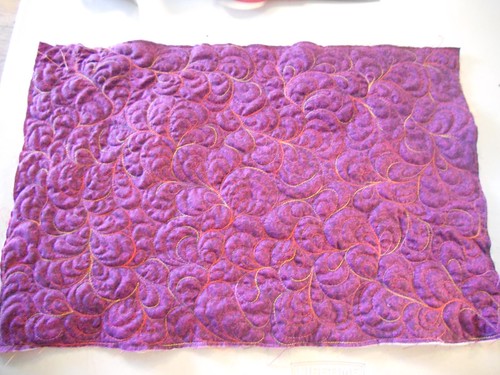
Here's a few more photos of the finished "center" section of the quilt:


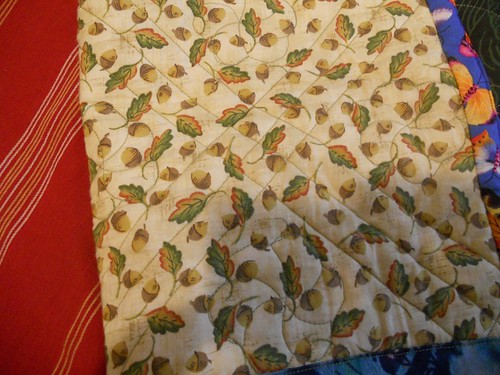
Tomorrow, I will wake up, get my coffee, turn on the latest episode of "WEEDS" that I'm watching on netflix, and start on the borders. I had a pile of new fabric in the same bag, so I'm assuming that's what I had already chosen for the borders. Hey, works for me! One less thing I have to think about.

~~~~~~~~~~~~~~~~~~~~~~~~~~~~~~~~~~~~~~~~~
~~~~~~~~~~~~~~~~~~~~~~~~~~~~~~~~~~~~~~~~~

Last week, I finished another batch of hand-dyes that I was hoping I could use for Sindy of FatCatPatterns.com's BOM "Fiesta"

I made a Flickr Slideshow of all the gradated fabrics and you can view them here.
I only used 4 colors, and did 2, 12-step gradations.
Brown -> Red -> Ecru
Brown -> Blue -> Ecru

I used procion mx dyes by jacquard and the actual colors are called "Carmine red" and "MEdium Blue" just in case you were wondering.


~~~~~~~~~~~~~~~~~~~~~~~~~~~~~~~~~~~~~~~~~~~`
~~~~~~~~~~~~~~~~~~~~~~~~~~~~~~~~~~~~~~~~~~~

One more thing!!!
I'm SUPER excited about the upcoming quiltvilleswap yahoo group CIVIL WAR swap!!!
FatQuarterShop had a sale of the eXACT fabrics I was eyeballing at the eXACT time I was wanting them!!!! So I bought a yard of each so I could have about a 1/2 yard of "leftovers" for me ;c) The other 1/2 yard I cut up into 2.5" by half WOF strips to swap. I took some photos of them just because I think they're so awesome. . . .


Look at all the squishies!!!!!!!

Thursday, September 1, 2011

Art---> Quilt---->Tote

A while back, my sweet friend Tamara, did me a huge favor by giving me her old blackberry cellphone. I go through many phones and the one she gave me has lasted longer than any other.

I wanted a way to thank her for her generosity.

Tamara is quite the artist, and one day she posted this photo on facebook:
Tam's Photo

Isn't it beautiful?? I told her that one day I would make it into a quilt....well, a quilted TOTE actually ;c)

Here is my interpretation of her piece of art, and the resulting quilted tote.
b6


Here's a step-by-step:
a1
a2
Leaves and STems
a3
adding flowers
a4
Adding Birds
a5
Basting

a6
outline quilting/ raw-edge applique
a7
Quilting the heart background
a8
Quilting Paisleys in the tote background
b1
Opposite side of the tote - quilted with paisleys
b2
The "wrong" side of the "quilt" - This orange fabric will be covered up with lining.
b3
Finished Tote!
b4
Back of finished tote
b5
again
b7
Lining/Pockets
Tam's Photo
Tamara's ARtwork once again
closeup
My interpretation - can you see the little beaded embellishments? I used beads as the flower stamens, and eyes of the birds!