Google Analytics

Showing posts with label How-to DIY. Show all posts

Sunday, August 7, 2011

Preparing Shirts for Tee Shirt Quilt

Here is a small photo tutorial on how to prepare your tee-shirts for a tee-shirt quilt.
I am in the process of making a tee-shirt quilt class available and want for my students to be able to finish the whole quilt IN CLASS. In order for us to finish the whole quilt, you will have to do your fusing at home. This is not a difficult process at all, just time consuming.

What you will need:
*1 bolt of of Pellon Fusible Stabilizer (Available at Jo-Ann's for $9.99 - look for a coupon)
Pellon Interfacing Lightweight Fusible 40 YD BOLT White

*Tee-Shirts
*Scissors
*Iron
*Spray bottle with water
*1 yard of cotton quilting fabric (you can just use a scrap piece, this is just to protect your iron)
*An Ironing board or several towels to protect your ironing surface


~~Click on any of the photos below to view them larger~~~
**Make sure to wash all of your tee shirts thoroughly with hot water especially if they are new. Do not add any fabric softener or spray starch.**

Cutting the Shirts:
1. Lay out your Tee, and smooth it out.
1a

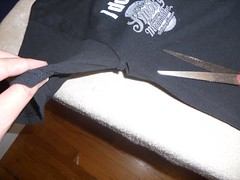
2. Make a small slit in the armpit of one of the sleeves.
1b

3. Stick your scissors in the slit and begin cutting - cut just INSIDE the seam until you have the whole arm part completely cut off.
1c

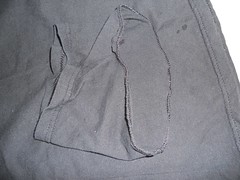
4. Here you can see where the seam is cutoff WITH the arm piece of the tee.
1d 1v

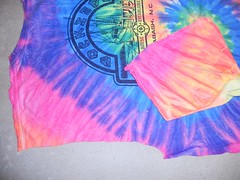
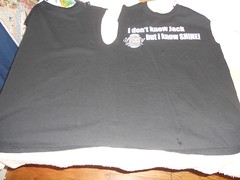
5. Repeat this step for the other Arm piece - your tee should now look like this:
1e 1u

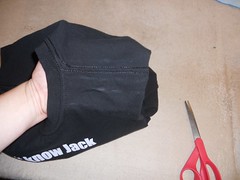
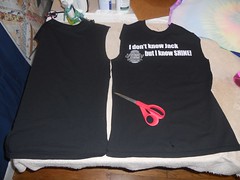
6. Pick up your shirt like this, you will now be cutting the shirt along the shoulder seam
1f

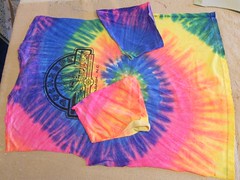
7. Cut along Both shoulder seams, it doesn't matter which side the seam is on - you can even cut those off if you wish.
1g

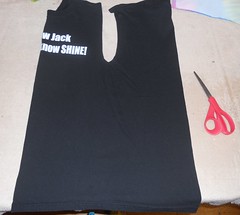
8. Carefully fold your shirt in half lengthwise to find the side seam. If there is no side seam try to just eyeball it.
1h

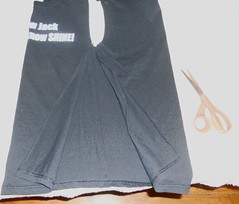
9. Cut along the side seam and repeat for the opposite side.
1i 1j 1k

Fusing the Shirts:
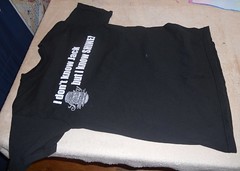
~~You will only be using the side of the shirt that has a logo on it. Sometimes there will be a logo on the front AND back, in that case you will fuse BOTH sides. ~~

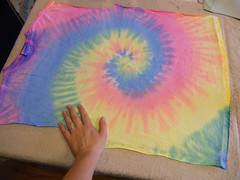
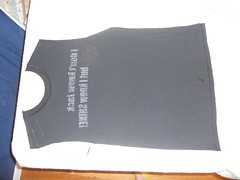
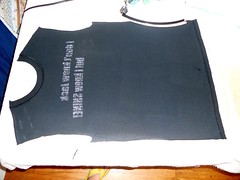
1. Lay out one of your tee shirts, Right-side down, WRONG side facing you. Smooth out your shirt with your hands.
1w 1l

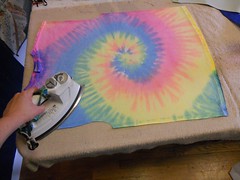
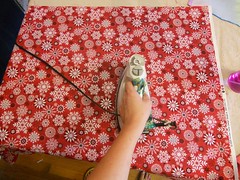
2. Get out any wrinkles by PRESSING with your iron on medium-high heat.
***You will not be IRONING at all, what you are going to be doing is PRESSING. Start in the center of your shirt and press down slightly with your iron. Press for a few seconds and then pick your iron all the way up, and lay it down next to the indention you just left. You will be able to see the indention the iron made previously, and so you will be able to see where you have already pressed and what has NOT been pressed. Please try to avoid ironing, (sliding the iron back and forth over your tee shirt) we are working with knits which are easily stretched. Once the woven stabilizer is fused, it will keep the tee shirt from stretching. If the shirt is already stretched when the stabilizer is fused, it will be stretched permanently. . . which is not a good look! ;c)
1x 1m

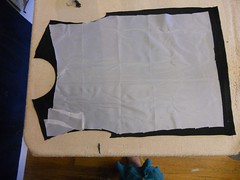
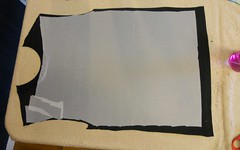
3. Place the stabilizer *rough* side down on your tee shirt. Cut the stabilizer to fit just inside your tee-shirt, because you don't want any fusible on your ironing surface ;c)
1y 1n 1z 2a

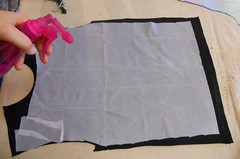
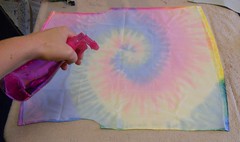
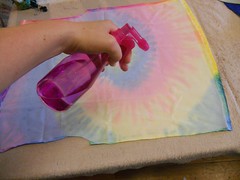
4. Spray a generous amount of water over top of the stabilizer. You want it damp but not soaking wet. Remember that if it doesn't stick the first time, you can just go over it again.
1o 2b 2c

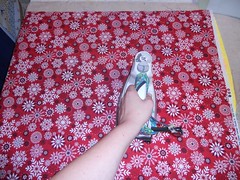
5. Lay a piece of cotton quilting fabric over top of your work, wrong side down. Press your fabric like in step 2 above. This time you will want to use medium-high heat, and press each section for at least 5 seconds.
1p 2d

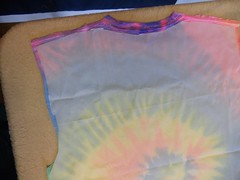
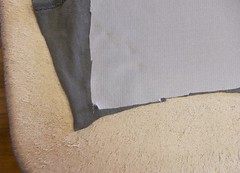
6. Now your piece should be nice and smooth and look a little something like this:
1q 2e
*BTW, you can use scraps of stabilizer if your piece doesn't fit the whole shirt. Just overlap the scraps just a bit, and it will be just fine.

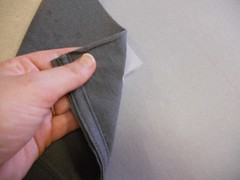
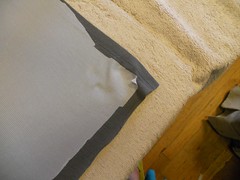
7. Check all corners of your stabilizer to make sure they are all thoroughly fused. Pull gently on the stabilizer - if it comes off easily like this - then you need to re-fuse. Spray a little water, cover and press again.
1r

8. If your stabilizer doesn't come off - or tries to shred like this - you are finished.
1s 1t

If you have any questions - feel free to email me - or ask in the comments section, I will respond ASAP.

Sunday, July 17, 2011

How-To Flickr Slideshow

I had a really hard time figuring out how to add a flickr Slideshow to my blog. Once I figured out how to do it, I realized I was trying to make it much more difficult than it really is.

If anyone out there is curious as to how to embed a slideshow from flickr onto your blog I will try to explain it here.

1. Go to Flickr and open and account if you haven't already done that.
2. Choose "upload" and upload any and all photos you wish to include in your slideshow.
3. Once the photos have been uploaded you have the option to add a description and tags. . go ahead and do that now.
4. While you are still on that same screen - at the top right hand corner there will be an option to "add to set" or "create new set." You will want to create a NEW set. Choose a name and description for your set and save.
5. Once you have saved, go BACK to the flickr homescreen. (Just click on FLICKR logo.)
6. Click on the link that says "YOUR PHOTOSTREAM" now all of your photos will show up to the left, and your SETS will show up on the right hand column of the screen.
7. Click on the set that you just created. Your set will show up and in the top right hand corner there will be an option to VIEW SLIDESHOW.


8. Choose the VIEW SLIDESHOW option and then you will get this screen:


9. At the top right hand corner there will be an option to "SHARE"
Click on "SHARE" and then click the 2nd code that will give you the HTML "embed" option.
Copy to your clipboard and then go to your blogger screen.


10. If you would like to include the code in a Blog Post, Copy-Paste the code here.
Now you have you can preview your Slideshow, and Publish your Post! ;c)

This is a slideshow I just made that includes all of the quilts and things I have created since 2006.


You can also add a slideshow to your blog by adding a GADGET.
Go to your DASHBOARD and click ADD GADGET.
Choose the HTML option. Enter the embed/HTML code from flickr and then save.
Now the slideshow will be on your sidebar of your blog for everyone to see.


Monday, January 3, 2011

Half Square Triangles... The Novel

With all the buzz over the latest Bonnie Hunter mystery Roll Roll Cotton Boll, and the step with the 600 HSTs, it has had me pondering...

How many ways can one make a Half Square Triangle...
....or is it a Triangle Half Square?

Many Quilters swear that their way of creating half-square triangles is the best... which method is YOUR favorite?

I have challenged myself to try to find out just how many ways there are to make HSTs. = D Here is a "short" list of all the various ways I have found broken down by method. I have also included links to tutorials and videos when available.

METHOD #1:
Cut two triangles and sew them together.
Either cut a square in half, or use a template to cut your triangles.

Pros: Great if you need to just make 1 or 2 HSTs/ Good for fussy cutting/ Nice if you do not have a rotary cutter/Good for especially large HSTs/Very little Waste
Cons: Takes the longest/ Still have to trim dogears/Might have to square-up

METHOD #2:
Cut Triangles from Strips with use of a specialty ruler.
Pros
: Great way to use up scraps/No need to cut-off dog ears/No need to square up usually/Very little waste
Cons: Slow process/Working with Bias
*EZ Angle Ruler - A favorite of Bonnie Hunter of Quiltville - Great for use in Scrap Quilts - Cut Triangles from Strips and also no need to trim dog ears.
*Fons and Porter Ruler -similar to the EZ Angle Ruler.

METHOD #3:
2 HSTs @once.
This is probably THE most popular method out there. Layer two squares right sides facing, draw a line down the middle, and stitch .25" on each side, then cut to create 2 HSTs (at once.)
Pros: One of the more efficient ways to make HSTs/ Very little waste
Cons: Will need to trim dog ears/Sometimes innacurate and needs squaring up
Without Specialty Ruler:
Photo Tutorial: http://www.quiltaholics.com/lessons/hst.htm
Video Tutorial: http://www.youtube.com/watch?v=OQq-5p8RCS8&feature=related
Using Specialty Ruler:
June Taylor Ruler: Assists in accuracy
The Angle Ruler: Goes on your sewing machine so you don't have to draw your lines on your square before sewing.

METHOD #4:
4 HSTs @once:
You can make 4 HSTs (at once) with this simple method. Stitch all around the edges of two square right sides together. Cut on the diagonal and VOILA!
Missouri Star QC shows us how it's done: http://www.youtube.com/watch?v=ekYpJzHoW6E
PROS: Good for mass-production/ One of the faster ways to make HSTs/Not a lot of fabric waste
CONS: Still have to trim dog ears/ Might have to square-up/ working with Bias edges

METHOD #5:
8 HSTs at once:
Draw two diagonal lines on your squares right sides together - stitch .25" on both sides of each line, cut, and you will have 8.
Click HERE for MY latest tutorial on 8@once HSTs.
PROS: You can make a lot at once time/Great for mass-production/Not a lot of waste
CONS: You still have to trim dog ears/ You almost always have to trim or square up/You have to start with a very big square so you must have some pretty big pieces of fabric for this

METHOD #6:
Paper piecing:
Stitch onto printed paper for amazing accuracy - Rip the paper off when you're done.
Pros: Very Accurate/No trimming/Little Waste/Great for Scrap Triangles and squares
Cons: Peeling off the paper/ additional cost- of paper and ink
*Thangles are available already printed on specialty paper and you supposedly don't have to change your needle or stitch length. (Great for Sawtooth borders)
*Trish Stuart shows you in this VIDEO how to use Freezer paper to paper piece HSTs. I think you are able to reuse these too? (Freezer paper would be easier to remove than regular paper)

METHOD #7:
Using Strips to make multiple HSTs
Penny Halgren shows you in this VIDEO how to make multiple HSTs using strips.
PROS: Great for Jelly Rolls or precuts/Little Waste/might be Good for Scraps/
CONS: Might have to square-up/Will have to trim dog-ears

METHOD #8:
The Grid:
Draw or print a grid on your large piece of fabric right sides together to make mass HSTs.
PROS: you can mass-produce your HSTs/ might be additional cost -ink and paper/little waste
CONS: Will need significantly large pieces of fabric to start with/ Will have to trim dogears/Might have some squaring up to do
*INKLINGO lets you print directly on your fabric for NO paper-piecing. Video Tutorial
*This Video shows you how to use CATS Templates. This is definitely new to me. Very interesting and I'd love to know your thoughts on this method if any of you have tried it.
*These two websites offer FREE Grids for you to print using your regular ink-jet printer OR you can print on to paper and paper -piece. Several sizes of HSTs to choose from.
http://www.quiltingandwhatnot.ca/Half-Square-Triangle.html
http://www.blockcentral.com/a-halfsquaretrianglepaper.shtml


METHOD #9:

Stitch and Trim - Stitch a Triangle to a square and trim off excess.


CONS: Wasteful
PROS: Good for working with very small pieces or pieces already in place./Accurate/

METHOD #10:
Applique/Pockets


Stitch around the edges of a folded square placed on half of a full square.
PROS: Great for small pieces/Nice 3-D Effect/Stitching is on the outside instead of within the block/Accurate/No trimming
CONS: Wasteful/Time consuming

METHOD #11:
HSTS from Tubes:
PROS: Good for Scraps/Good for Precuts/Fast
CONS: Some squaring up required/must trim dogears/ Bias Edges
Tube Method Video


Additional:
I also found this interesting VIDEO. This method makes 2 HSTs and 2 QSTs at once by sewing together little pocket 4 patches. CHECK IT OUT!