Google Analytics

Tuesday, July 5, 2011

*PART 4 - Joining Blocks*

Part A ~ Connecting the Rows

Before sewing, arrange your blocks in a manner that is pleasing to you. Keep them in order by labeling the blocks. Write the letters "A" through "i" in the top left hand corner with chalk.
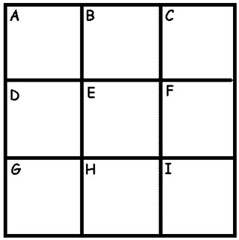
9patchGrid2

Click on any of the photos if you would like to view them larger.

1. Lay out blocks "A" and "B" and butt them next to each other.
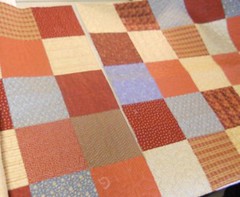
6a 6a2

2. Pin at each 6" interval like this:
6c2

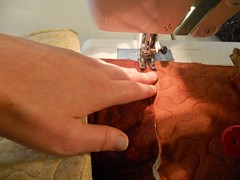
3. Set your machine to a wide zig zag stitch. You can use ANY type of thread for this stitch because it will be covered up later. Clamp the side that will be going through the throat of your sewing machine. This is how it should look before you feed it through the machine for each step:
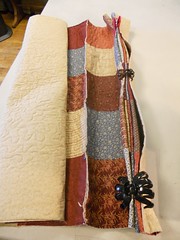
6d

4. Remove the first pin, and place the quilt blocks under the machine foot, and lower the needle into one side.
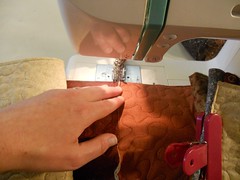
6e 6f

5. Begin to stitch a wide zig zag stitch for about ONE INCH.

6. Remove the next pin, and make sure the next two seams are matched. Stitch until you get ONE INCH past the next seam, easing the two sides together so they match.
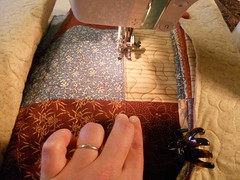
6h 6i 6j

*****This is the reason I chose this design for a beginner QAYG tutorial. If you are using a different design, mark your intervals at 6" or so with chalk on both sides. This way you can ease the sides to match gently. It is VERY easy to end up with an extra INCH or so hanging off one side if you're not careful.

8. Repeat this until you are finished stitching together sides "A" and "B"

9. Repeat these steps but this time with sides "D" and "E", - and - "G" and "H"
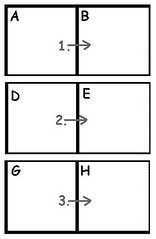
Grid1
10. Now you will add the 3rd block in the row
"C" gets added to "A/B"
"F" gets added to "D/E" and
"i" gets added to "G/H"
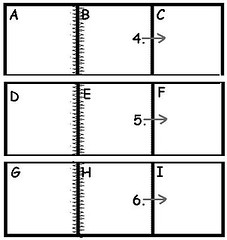
Grid2
11. Now you should have 3 rows of 3 quilt blocks. "A/B/C", "D/E/F", and "G/H/i"
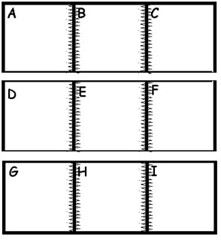
Grid4

Part B ~ Add Sashing Strips to Rows

Set your machine up with thread to MATCH the SASHING Fabric.

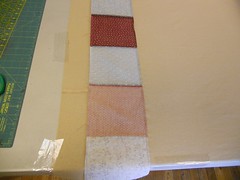
1. Start with the A/B piece. Grid6 Turn the row over so that the backing is facing you. Lay a strip of folded sashing on one side of the sewn blocks. Pin in place.
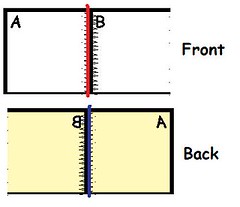
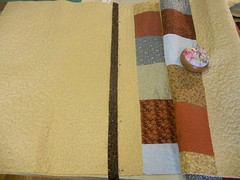
7a

2. Flip the piece over. Lay another folded sashing strip on the front side. Pin in place, in between the pins from the back side.
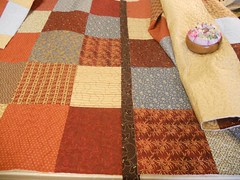
7c

3. Flip the piece over and remove the pins from the back side.
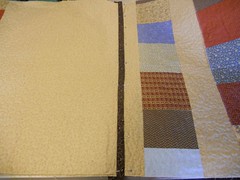
7d

4. Turn the piece over again, the top should now be facing you. Place the pins from the back, in between the pins in the front. (The more pins the better.)
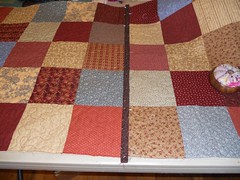
7e

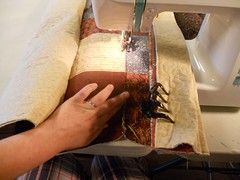
5. Place the piece in the machine and stitch a wide 3/8" seam. Remove the pins as you stitch.
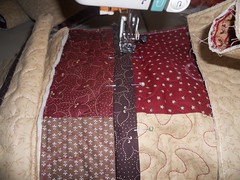
7f

6. Repeat the previous steps for piece D/E, and G/H.
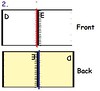
Grid7 Grid8
7. Now starting with the A/B/C piece you will add the sashing strips between blocks B/C, E/F, and H/I
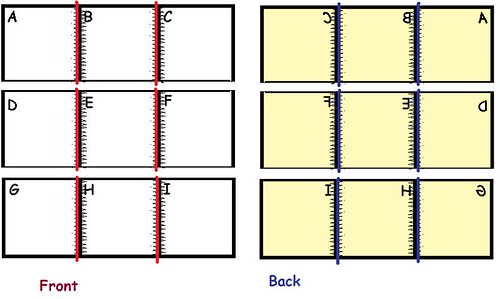
Grid5
Refer to this grid if you get confused about which side to sew the sashing strip.
Your sashing is now attached to ONE side of BOTH the front and the back of the pieces. Begin the next step with any piece, and you can CHAIN STITCH until you finish with all of the rows. Just keep feeding the 3 rows through until you're done.

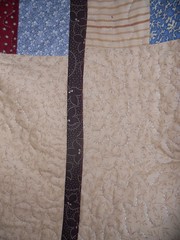
8. Starting with the BACK facing you, fold over the folded edge of the sashing to the opposite side of the stitching. Pin in place.

9, Stitch down the folded edge approximately 1/8"
8b

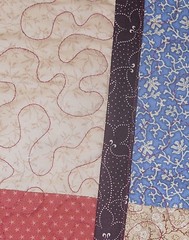
10. Flip piece over so the FRONT is facing you. Do the same for the back sashing. Fold over, pin in place, and stitch 1/8" from the folded edge.
8a

11. the FRONT should now be facing you.. Stitch another row of stitches, as close to the folded edge as possible, or just within the 1/8" line of stitching. This row of stitching is just for security.
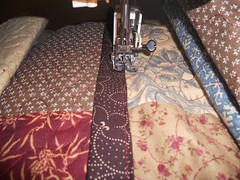
8c

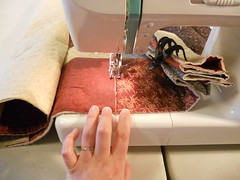
12. For the final stitch you will be doing a TOPSTITCH. (stitching line on the opposite side of your previous stitches - This stitching will go over your seams.)
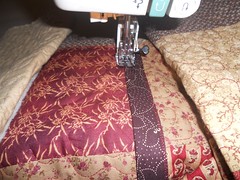
8d

13. This is what it will look like on the front. You should see 2 rows of stitching on ONE side, and one row of stitching on the other side. From the back you will see 3 lines of stitching on one side, and one line of stitches on the other side.
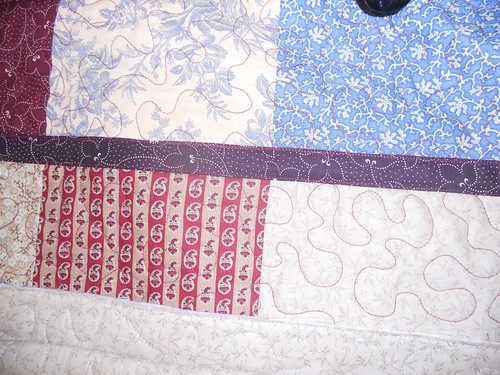
8e

This is the 3 completed rows of stitching laid out on the bed:
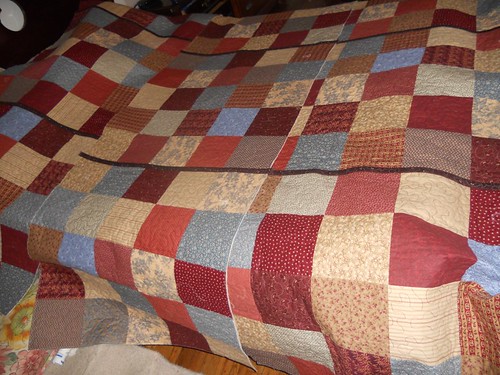
7g


Part C ~ Connecting the Rows

Now you are going to join the rows into columns. This is done exactly like the previous steps were done. Start by trimming any excess sashing.

1. Lay out row A/B/C and butt it up next to D/E/F . Fold in the edges, and clamp the side that will be fed through your sewing machine. Start by Zig-zagging, and THEN add your sashing as in previous steps. This is what it will look like pinned and ready for your Zig-Zag Stitch.
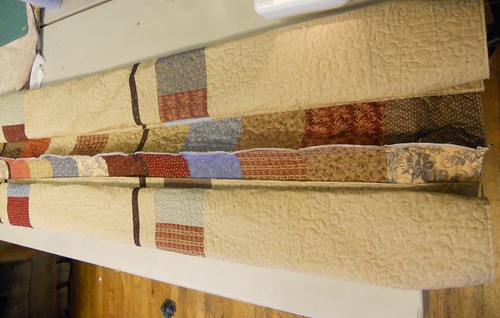
9a

2. Take care to not only match up 6" squares/intervals, but also the sashings.
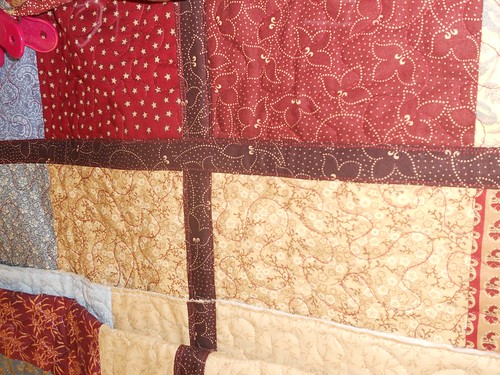
9b

3. Repeat the previous steps but this time you're joining the D/E/F side to G/H/i


Sunday, July 3, 2011

*PART 3 - Piecing the Top/Quilting*

Part A ~ Assembling your Top/Blocks

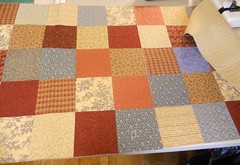
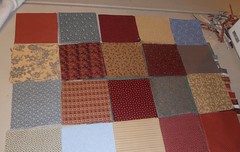
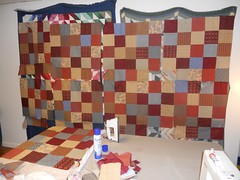
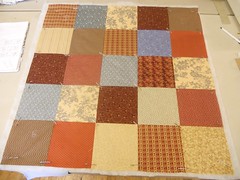
1. Pin your 6.5" squares together in rows of 5.
3a
2. Press seams to one side.

3. Stitch each sewn strip to another sewn strip.
3b
4. You will be joining 5 rows to make one "block."
3d

5. Press these seams OPEN.

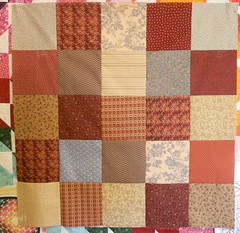
6. When you are finished, you should have 9 "blocks" ~~~ each block will include 25 charm squares, 5 rows, and 5 squares in each row.
3c

7. Give each BLOCK a final pressing with STARCH.

Part B ~ Assembling the Back

You need 9 blocks equaling at least 33" square.

Cut these blocks out of yardage, or piece leftover fabric together to equal 33"

Press seams to the side. Press the RIGHT side of your backing squares, and use starch.

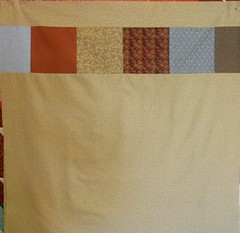
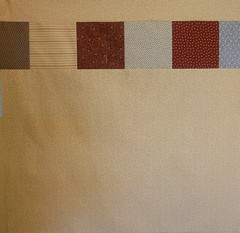
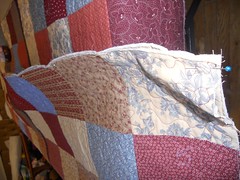
Here is two of my pieced backings I'm using for this quilt:
4a 4b
Do these however you want! ;c)

Part C ~ Batting
Cut batting squares to equal approximately 31" square

Batting can be pieced from leftovers, just please always use the same loft and preferably the same BRAND of batting throughout your quilt. You don't want different weights of batting in one quilt ;c)

To piece batting, use a needle and thread. Fold one long piece of thread in half, and stick two raw ends through the eye of the needle. Stick the needle through a 1/8" of one side of the batting, and pull thread ALMOST through. There will be a small loop, so just put your needle through the loop for a clean knot to start your sewing.

Start with batting butted together. Take your needle through a bit of the batting on the opposite side from where you started. You can make very large, relatively loose stitches. Once you quilt the quilt, the batting will stay put. You just need to stitch a few stitches to hold the batting together.

If you have a lot of batting that you want to piece, you CAN use a large, wide zig-zag stitch on your machine. Just make sure you're using a thin thread, and the batting isn't overlapping.

Part D ~ Quilting

1. Lay down one of the backing pieces, wrong side facing UP.

2. Tape down edges/corners to your table/work surface. You want to keep the backing piece taut, but not stretched too much.
5f

3. Next lay down your batting piece in the center and smooth out any bumps or ridges.

4. Next Lay down one of your top pieces (30.5") on top of your batting piece, RIGHT side facing up

5. Starting in the center of your piece, begin to pin with large, safety pins.

6. Pin toward the sides, and then out to the corners. As you are pinning, gently stretch the top to where it is TAUT, but not stretched. You want the top to be the same tautness as the backing.
5a
7. Once the sandwich is pinned, go to your machine, and stitch 1/4" from the edges.
5b
~~you may have to remove pins as you sew ;c)
8. Quilt as desired - this method is PERFECT for free-motion practice! ;c)
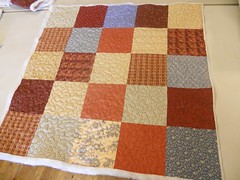
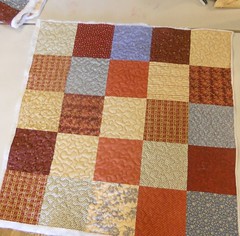
5c 5d 5e

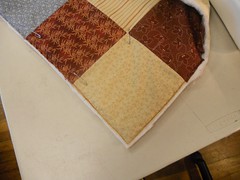
9. Trim off any excess batting and backing. There should only be 1/4" or less past the stitching line.
5g


*PART 2 - Assembling the Binding and Sashing*

Press your Binding/Sashing fabric ~ Use starch if needed (I just used water in a spray bottle )
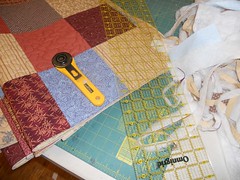
The first step is to make your bias binding and your sashing for the whole project. Both will measure 2 1/4" wide. I have provided a link below to a detailed bias binding tutorial if needed.

Part 1 - Bias Binding
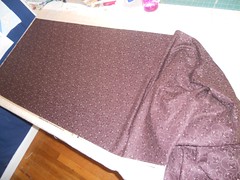
1. Cut off 5/8th yard off of your Binding/Sashing Fabric and make sure it is pressed well. 1

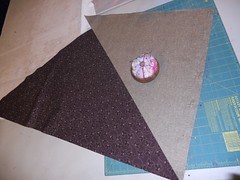
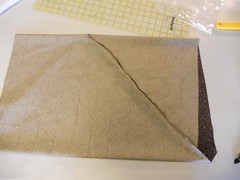
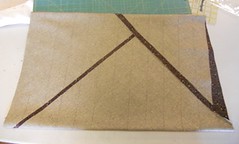
2. Fold down one corner and then cut on the diagonal.
Place the cut piece on the opposite side of the piece of fabric and pin in place.
1a
Sew Right sides together.
Press seams open

3. Draw lines parallel to the bias-cut edge of the fabric 2.25" on the WRONG side of the fabric. You can use chalk, a quilt marker, or a thin pen or pencil.

4. Now you will line up the draw lines of one side, to the opposite side, skipping the first line on one side. For a detailed Bias Binding tutorial go HERE.

5. Pin on each drawn line
1b 1c
6. Stitch 1d

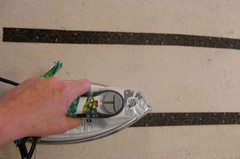
7. Press seams open. 1f

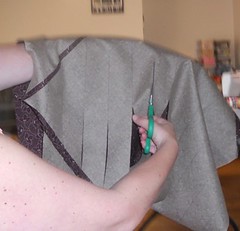
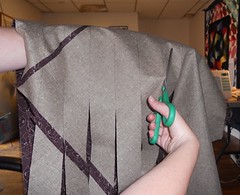
8. Cut along the drawn lines with scissors. Warning: this part is boring and tedious ;c)
1h 1g

9. Trim your binding, and press in half lengthwise. 2g

Once your binding is pressed, I recommend wrapping it around a toilet paper or paper towel center to keep it neat. Set this aside for later.

Part 2 - Sashing

This is what will connect your quilted blocks, and hold your quilt together!

1. Press the rest of your fabric and use starch or water if necessary.

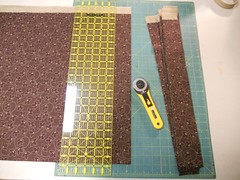
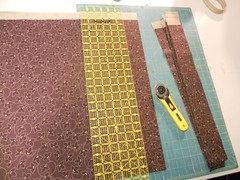
2. Cut 2.25" strips from the fabric.
2a 2b

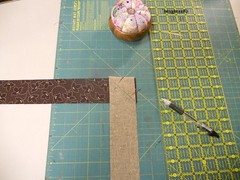
3. Pin each strip together on the diagonal (to reduce bulk) Draw a diagonal line with chalk or a pen. 2c

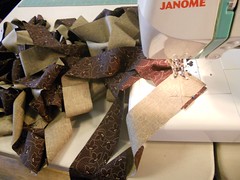
4. Stitch and press seams open, and trim dog ears.
2e

5. Press the whole long strip in half lengthwise.
2g
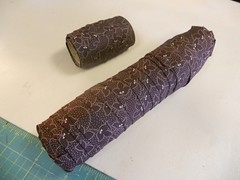
6. Wrap your pressed strip around a paper towel center to keep it neat.
My binding is wrapped around a Toilet Paper center, and my Sashing is wrapped around a Paper Towel center. There will be MUCH more sashing needed then binding. . ;c)
2h
Set Aside for later.


*PART 1 - Materials/Supply list*

QAYG - Charm Quilt
*Finished Quilt size = 90" x 90" - QUEEN-sized
*Size of Charms - 6.5" UNfinished, 6" Finished
*225 Total Charm Squares
*9 Sections = 30.5" square each - 25 Charms in each Section
~~~ I used several different sizes of yardage and Fat Quarters to get the 225 Charms that I needed for the quilt. But if you want to buy fabric specifically for the project, here is a general idea of what you will need:
*1 1/2 yards of 5 different fabrics
*1 yard of 9 different fabrics
*5/8 yards of 15 different fabrics
*3/8 yards of 25 different fabrics
~~~Generally, with a charm quilt, the more variety the better. I used 19 different fabrics in my quilt.
~~For the back of the quilt, you will need 9 different squares measuring LARGER than 30.5" Feel free to do a scrappy back, and piece some fabric together to equal at least a 33" square. If you would like to purchase yardage especially to use for the backing, you will need 8.5 yards.

Materials Needed:
225 - 6.5" squares
9 - squares measuring at least 33" (can be pieced from scraps)
9 - squares of batting measuring at least 31" (also can be pieced)
2.25 yards - Fabric for sashing and Binding.
Piecing thread - I recommend Aurifil 50wt or Invisifil 112wt
Quilting Thread - Should compliment your charm squares
Sashing/Binding Thread - should blend well with binding/sashing fabric.
LOTS of long, quilting pins
Large Quilting safety pins
Quilting clips, Bag Clips, or Hair clips
Walking Foot - it is HIGHLY recommended you use a walking foot during the whole process.
Sewing Machine with a straight stitch as well as a wide zig-zag option.
Thin line ink pen or pencil
Chalk or Quilt marker (invisible ink)
Rotary Cutter
Self-Healing Mat
Quilt ruler
Scissors
Iron
Tape
Plastic-coated Paper Clips (optional)
1 Paper Towel center and 1 Toilet Paper center (optional)
Needle and Thread (if you're piecing your batting)

Assume all seams are 1/4" Seam allowance unless noted ** We will be adding the sashing and binding with a 3/8" Seam allowance. **

To begin, set your sewing machine up with your walking foot and your piecing thread.


Friday, July 1, 2011

Quick and Easy QAYG Tutorial - INTRO


Yes, it's true! Quilt-As-You-Go can be QUICK and EASY.
Here is a slideshow of past QAYG quilts I have made:

I have decided to divide this tutorial into several parts. I want to be very thorough with this tutorial. Not only will I be showing you the QAYG method, but I will also be showing you a very easy quilt pattern to make.
If you are new to QAYG, I strongly recommend you use this simple charm square pattern for your first attempt at QAYG. There are MANY reasons why this pattern will benefit you as you are learning the technique. ...more about this later. . .


This is very important: Finishing your quilts with this method will NOT give you "quilt show" quality results. There is absolutely NO HAND PIECING at all with MY QAYG method. Everything can be done with your domestic sewing machine. Quilting your quilts with this technique will give you FAST, and EASY results. You could easily finish a bed-sized quilt in a few weekends. Trust that if you follow my instructions properly, you will have a quilt that will withstand years of washing. These are the techniques you use if you want the quilt to be snuggled with and loved for lifetimes.....

This QAYG technique was formed from necessity on my part. I am not a rich person, so I have never been able to afford a longarm service for my large tops. I also love the satisfaction of quilting a quilt from start to finish by yours truly. I absolutely love the look of the intricate quilting the longarm quilters can provide, but it is nearly impossible with a DSM (domestic sewing machine.)

Although this QAYG method is easy, there will still be lots of standing and stretching involved when you get towards the end. SO, the challenge is YOURS if you so choose to accept it!

Click the links below to begin and GOOD LUCK!!


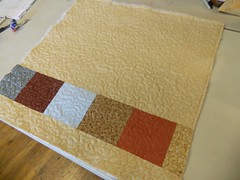
Finished Quilt


Friday, June 24, 2011

Please Vote for My Quilt!!

Right now I am neck-and-neck with another quilt for the win!! Every vote counts!! It would mean so much to me!!!

Remember the name of the quilt is called "GOLF COURSE FOR DADDY" ~ Katie Wiseman

PLEASE VOTE FOR MY QUILT!!!!


This is one of the first quilts I ever made and it was for my Dad for his birthday.
I told him I was making him a quilt and asked him to pick the "theme" of the quilt. He of course requested a gOLF COURSE quilt!! hahahaha. My dad is a BIG golfer . . .and he's really good at it! So, it's not exactly a GOLF quilt, BUT I think I accomplished the COLORS of a golf course anyway. . .hee hee
I went to the fabric store looking for golf course colored fabric. . . I found lots of Green for the fairway, water hazard, sand bunker, sky, etc., ;c) ;c)


This is my dad and me at my wedding ;c)


THANNKKKK YOUUUUUU!!!!!!!!!!!!!!


Thursday, June 23, 2011

Stella Top


I have just finished my top "Stella." It's the Jinny Beyer pattern "Crystal Star" but I left the jagged edges off and the thin pale yellow strips off the pattern. I was thinking of adding some applique but I think some clever quilting would soften the edges.
If anyone has any quilting suggestions I would greatly appreciate them!!!

This quilt was stitched together VERY quickly. It only took me 3 days from start to finish. Probably because the Jinny Beyer palette strips were pre-cut, AND, the instructions were so nice, and clear. VERY easy stitching for amazing results. I am in LOVE with the Jinny Beyer palette strips!!!

I will be hanging this in my sewing area to use as a guide. Isn't it amazing? I am thrilled with how it turned out. The colors almost illuminate in the quilt! I love you Jinny Beyer! hahaha


Monday, June 20, 2011

Following The Lamb Wherever He Goes: Lucia's Memory Quilt - Will you be a piece of brin...

Following The Lamb Wherever He Goes: Lucia's Memory Quilt - Will you be a piece of bringing her home?: "I am so excited to share Lucia's Memory Quilt fundraiser with you! I am having a snowball signature quilt made for Lucia. Here is a genera..

Please visit my friend Tracy Morgan's Blog, to view my next (upcoming) project.
Tracy is in the process of adopting a child from Mexico with down-syndrome. She has named her "Lucia" which means "light."
As we all know, adoption fees are insanely expensive, and Tracy has been working endlessly to raise the money for all fees upon fees that it takes to bring Lucia finally home to her.
Her latest effort is a quilt project in which the supporter will have the opportunity to sign a quilt block in return for a donation. We collaborated and felt the snowball block represented best what look we wanted Lucia's quilt to have.
It's going to be a scrappy snowball quilt, and some of the signatures will carry onto 2 or 4 "blocks." I think this will add aLOT to the usual hum-drum snowball quilt. This option is especially nice since this is such a unique situation.

Would you like to help bring Lucia home? Stop over to Tracy's blog, and make a donation to have your signature included in her quilt. I will be posting the final quilt and my step-by-step process here, on my blog.

Thursday, June 16, 2011

MY FRIEND IS HOSTING A GIVEAWAY!!!!

I want EVERYONE to go check out my friend, J Rachel Besnard's blog RIGHT NOW!!! =cD

A little bit about Jonua ~
Jonua and I were friends when we were both children, and we are now reconnecting as adults. She is one of the most amazingly creative people I know. Jonua makes GORGEOUS jewelry. When you see it I just know you'll agree - her pieces are so intricate and just stunning. She has an amazing eye for color and design and utilizes that gift when making her beautiful pieces of jewelry.
Jonua lived very close to me, in a small town in West Virginia, until she found the love of her life, got married, and moved to Paris. Yes, her husband is French!

So go check out her stuff right now at her ArtFire Store:

When you're done with that, make sure to go to her BLOG, "follow" her, so you'll be entered into the giveaway drawing.


Again, click HERE to go to her BLOG!!!

Wednesday, June 1, 2011

Covering Joplin with Love

~~Repost from Fellow quilter of Scratchingpost yahoo group~~~~~~


Most people are aware that an extremely destructive [EF-5] tornado struck Joplin, MO the evening of May 22, 2011. In the 10 days since, many of us who reside in southwest Missouri have been responding to the urgent need for assistance to that community at every level. Sindy has kindly approved my posting this message with regard to a call for help from quilters. I am personally involved with the project described through the church with which I am affiliated, and will gladly answer any questions anyone should have. Please carefully consider this plea to get involved with Joplin, Missouri tornado relief.
Dee-MO, aka Lighthouse-MO

*****
"Covering Joplin With Love"

Quilters all over the country are invited to send one or more quilts for distribution to persons whose home was damaged or destroyed in Joplin, MO when an EF-5 tornado struck on May 22, 2011.
The need is urgent and enormous. Quilts of all sizes are needed: light-weight summer quilts for babies and children, youth and adults for this time of year would be especially useful. Crib, twin, double, queen … king....any weight batting…. ANY and ALL SIZES will be put to use immediately and in the months to come as thousands of people have been left without housing and furnishings. We ask that you employ the quilter's high standard of quality – please only send an item that you would be pleased to receive. Contributions may be personally delivered or send to:

"Covering Joplin with Love"
c/o Brentwood Christian Church
1900 E. Barataria
Springfield, MO 65804-3835

Quilts may be sent by UPS, Fed-Ex or United States Postal Service. For more information, call the church at 417-881-0144, Jeanne Nixon, 417-883-5182 or Charlie Bahn, 417-234-6826, or email
CoveringJoplinWithLove@gmail.com