Google Analytics

Thursday, April 19, 2012

Signature Memory Quilt - printing on fabric


Remember THIS post? This was a fundraiser quilt for a woman who is adopting a little girl. Each person donated to the adoption fees by purchasing a block. Each block uses a different font and I printed the "signatures" on 6.5" blocks of white fabric.

I attempted to make "snowball" blocks, BUT the resulting quilt doesn't look like snowballs. For the corner triangles I cut up charm squares from Kona cottons.


I've had these charm packs for a couple years or so, and thought this project would be the perfect project to break them out. Now I know that for snowball blocks you should NOT use a variety of lights and darks for the corner blocks - lesson learned BUT, I still think it's very colorful and pretty ;c)


I spent alot of time working with the layout for this quilt, there were around 80 or 90 "blocks" and so I went for 90 blocks in a 9x10block layout.
The problem is that typically you can only print 8.5" x 11" sheets. That means that you could print FOUR 3.5" x 5" photos, TWO 5"x 7" photos but these are too small, and any other size you would have to waste SOO much fabric if using a whole sheet.
So this is how I do it:

Right click on the photo you want to print (my signatures were saved as .bmp photos.) Click print. Then when it asks you what size you want to print click on "custom size."
Then it will let you define the custom size of paper you want to print. Mine were 6.5" x 6.5" for a 6" finished block.

Make sure you are working with CLEAN white fabric backed with freezer paper. I press the freezer paper to the fabric in large sheets, then cut. Once all of the blocks are cut, I will go over the freezer paper one more time with the iron to make sure it is nice and "stuck" to the fabric before it goes through the printer.
TRY not to handle the fabric backed with freezer paper too much before you put it in the printer. I took a business card and picked up the cut blocks trying to keep them flat/straight as I GENTLY laid them into the printer.
I recommend printing a practice block to see what side goes in first/top.

If the freezer paper is not good and stuck, or if it has been handled too much, it will come loose from the freezer paper and jam up your printer. this is NOOOO fun believe me!!!
So just be very careful when you're printing.
I know there is bubble jet set and other solutions you can apply to your fabric to make it "colorfast." I have tried every method in the book, my printed fabric will STILL fade with every wash. I do NOT recommend washing your printed fabric. After all, it is JUST printer ink, it's not procion mx dye and is not intended to actually dye your fabric.

You CAN use the iron-on transfers, but these are sticky and will gum up your needle. I find they are difficult to quilt through and leave an "ugly" residue on the fabric. Another option that I DO like is screenprinting. Walmart will screenprint photos for you and leaves a beautiful smooth finish and is very easy to quilt and extremely colorfast.


Here's the finished top!:
anddddd a side view ;c)


And the hanging sleeve ;c)

Monday, April 16, 2012

New baby quilt finished


I'd like to share with you a project I've been working on or the past few days.
This quilt is a 3-generations baby quilt. I trapuntod the 3 lady's names in the inner grey sashing and the year the youngest baby was born (2012.)

The Fabric I used for this quilt is all by "Ritzy" except for the inner grey border which is "Etchings" and the backing fabric which is "Lily & Will."
Thread is light grey Aurifil, Light Pink Mettler, and Dark Grey Connecting Threads.
I messed up on a block. . WHOOPS!
Finished TOP!
Then, using a water-soluble marker I write what I want to Trapunto on the top side of the quilt.
I used several layers of high-loft battting and pin it to the back. Then with a free-motion foot I quilt around the lines I drew. You can use water-soluble thread or thread to match the quilt top or invisible thread. Then *very carefully* you cut aroundd the edges of the batting. This takes quite a long time ;c) You have to be very careful NOT to cut into the quilt top.
Then starting from the outside edges and working inward, you densely quilt up to the edges of your text or shape you want to stick out.
I used a kind of figure-8 design. . because I've decided I'm no good at microstippling. WHO CARES of lines are crossed! ;c) you just want to realllllly get that area quilted as much as possible. . you can just squiggle all over the place if you want.
Here's the 4 areas with trapunto finished:

Center of the quilt all quilted:


Here's a closeup of the center - I did my version of McTavishing in the white areas of the Ohio Star blocks and then outline quilted in the pink areas (star areas.)
Shot of the back:

I love the look of the sun shining through a quilt - you can see all the seam allowances and it looks really cool to me.

I did a sort of squiggle in the inner grey border and a half feather in the outer border. I only had time to do a half feather. . I know this would have looked much better with a full feather.

Friday, April 6, 2012

It's a QUILT YARDSALE!! - With Quiltville

I CAN ONLY SHIP TO US RESIDENTS! SORRY!
PLEASE COMMENT IF YOU WOULD LIKE TO PURCHASE ONE OF THESE ITEMS, LEAVE YOUR EMAIL ADDRESS AND i WILL SEND YOU A PAYPAL INVOICE. PLEASE PAY WITHIN 24 HOURS. THANK YOU.

Also, if I'm slow to respond just bear with me, I'll be at work today and checking periodically with my phone.
I have a few duplicate items that I'd like to sell.
First of all, I have 4 rotary cutters. . . yes FOUR. I've tried two of them, but went back to my original rotary cutter. So the first two have just been used once. Also there is NO blade in them because I just took the blade out and used it ;c)

The first one is fiskers 45mm Rotary Cutter.
$5 + $5 shipping = $10 (sold)
JUST THE CUTTER NO BLADE =C(
used only once.


The next one is an Omnigrid rotary cutter:
This one comes with a little pink container that holds the cutter.
$5 + $5 shipping = $10 (sold)
NO BLADE SORRY =c(
used only once.


The next one is NEW IN BOX never used. Purchased from Hobby Lobby. (Originally $15)
This comes with ONE blade.
$8 + $5 shipping = $13 (sold)


I've collected all of these 2.5" squares of multi-colored and floral prints.
I will sell these for $10 + $5 shipping. (sold)
(unwashed) - these are MOSTLY quilt-shop quality. . but some of them might be Joanns.


I'm selling this JUNE TAILOR cutting mat. 23" x 23" Has different applique shapes and stuff on it. I've never used it.
http://store.junetailor.com/store/p-69-23-x-23-grid-quilting-mate-with-templates-mat.aspx
This is NOT a self-healing mat. Original price: $35
$10 + $10 shipping. (I'm afraid this will be a bit more expensive to ship since it can't be bent)


This last one is a paper trimmer. It was a gift to me. (Never used) Comes with ONE 45mm blade.
24" x 6.5" size.
$7 + $7 shipping = $14


IF YOU WOULD LIKE TO TRADE - please contact me at Krati@aol.com
I collect quilt books and of course, fabric ;c)
First come first serve ;c)
Thank you for looking!
Also, if you're local feel free to message me and we'll shave off the shipping cost.

Now head over to QUILTVILLE and check out everyone else's items. Bonnie has a TON of nice stuff!!!


Wednesday, April 4, 2012

Aurifil Thread Giveaway


1. AGreen5012, 2. AMaroon4030, 3. ASkyV4663, 4. APinkV4660, 5. AEvergreen2892, 6. ANavy2785, 7. Adkblue2784, 8. Abblue2780, 9. Admaroon2465, 10. Abrown2468, 11. Amaroon2460, 12. Adplum1240

Head over to Lily's Quilts and join in the fun! They show you how to play along for your chance to win a custom-set of Aurifil. I choose the colors that I use most often. These colors make me want to sing! I named this set : You make-a-my dreams come true.
This set would be amazing for the quilter who uses alot of civil war reproduction fabrics. Of course the two variegated pastels are a bit different, BUT, I love them too and I am weird. ;c)
Would you buy this set of thread?

Wednesday, March 21, 2012

Project Quilting #6 ZIGZAG!

Project Quilting Challenge "ZigZag"

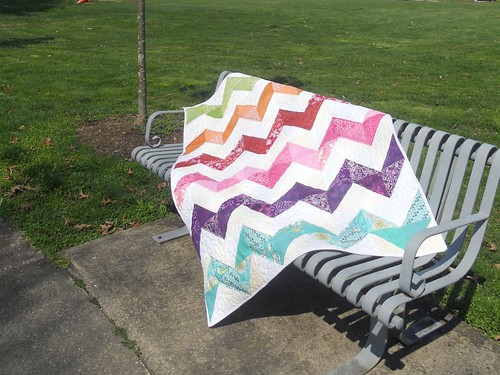
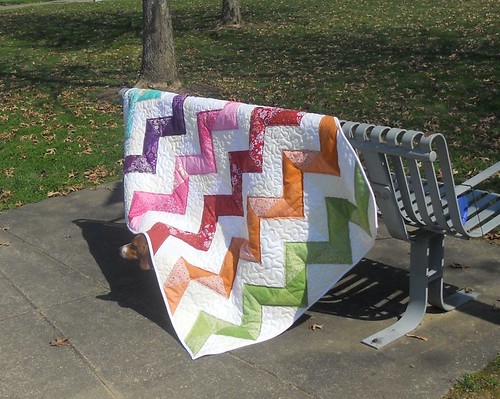
I didn't have AS much time this week to work on my PROJECT QUILTING challenge, but I STILL Wanted to participate!!! I named this quilt: "Berries & Cream"

I will admit I am not the most creative person in the world. Also, I have never made a zigzag quilt before so I tried to keep it simple. The thing that should impress everyone is that I made this in just a matter of hours. I started Tuesday evening and finished Wednesday afternoon. I picked out scraps from my stash paired with neutral scraps (white/beige/creams) For each "zigzag" i used colors from the same family. In the neutral areas I stipple quilted. After I finished with the stippling I LOVED how the colored areas looked all puffy. So I just did an outline about 1/4" from the edges of the colored zigzags to keep the "puffiness."
Project Quilting Challenge "ZigZag"
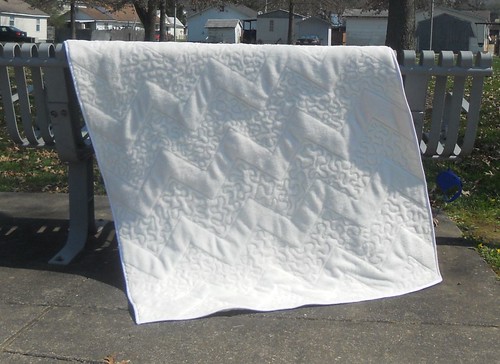
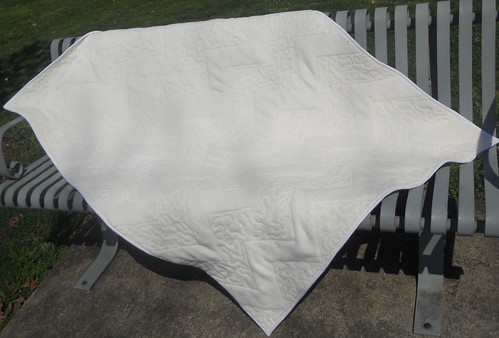
For the back I used super soft Minky Fleece.
Batting-100% polyester(high-loft), but everything else is 100% cotton. Bound with Kona pure white.

I went to the park to take some photos because it was a beautiful sunny day!
Project Quilting Challenge "ZigZag"

Head on over to KIM'S CRAFTY APPLE Flickr Group to see all the submissions for this week and past week's challenges!!