Google Analytics

Showing posts with label Baby Quilt. Show all posts

Sunday, November 16, 2014

Amelia's 1st birthday Quilt with Minkee Backing and Binding.


I wanted to give sweet baby Amelia a "Katie Quilt" for her birthday.  I used everything from my stash.  I started with this large piece of minkee fleece that I had leftover from another project.  It's super soft and BIG so I didnt' have to piece fabric together for the backing.   I have used Minkee for  backing before, but I always used batting ALSO, but this time I left out the batting.  For a large, bed-size quilt I think batting is fine, but I wanted something that she could lug around herself, so it needed to be LIGHT too.   


Double Sided Minkee is thick enough that it doesn't require batting.  Also, it gives a very nice effect when free-motion quilted.  However there is a slight downside when you omit the batting.  When there is no batting, there is nothing for the fleece to stick to.  The batting acts as a stabilizer so that your fleece doesn't shift around.  To remedy that problem I just used lots of safety pins in the basting process.  


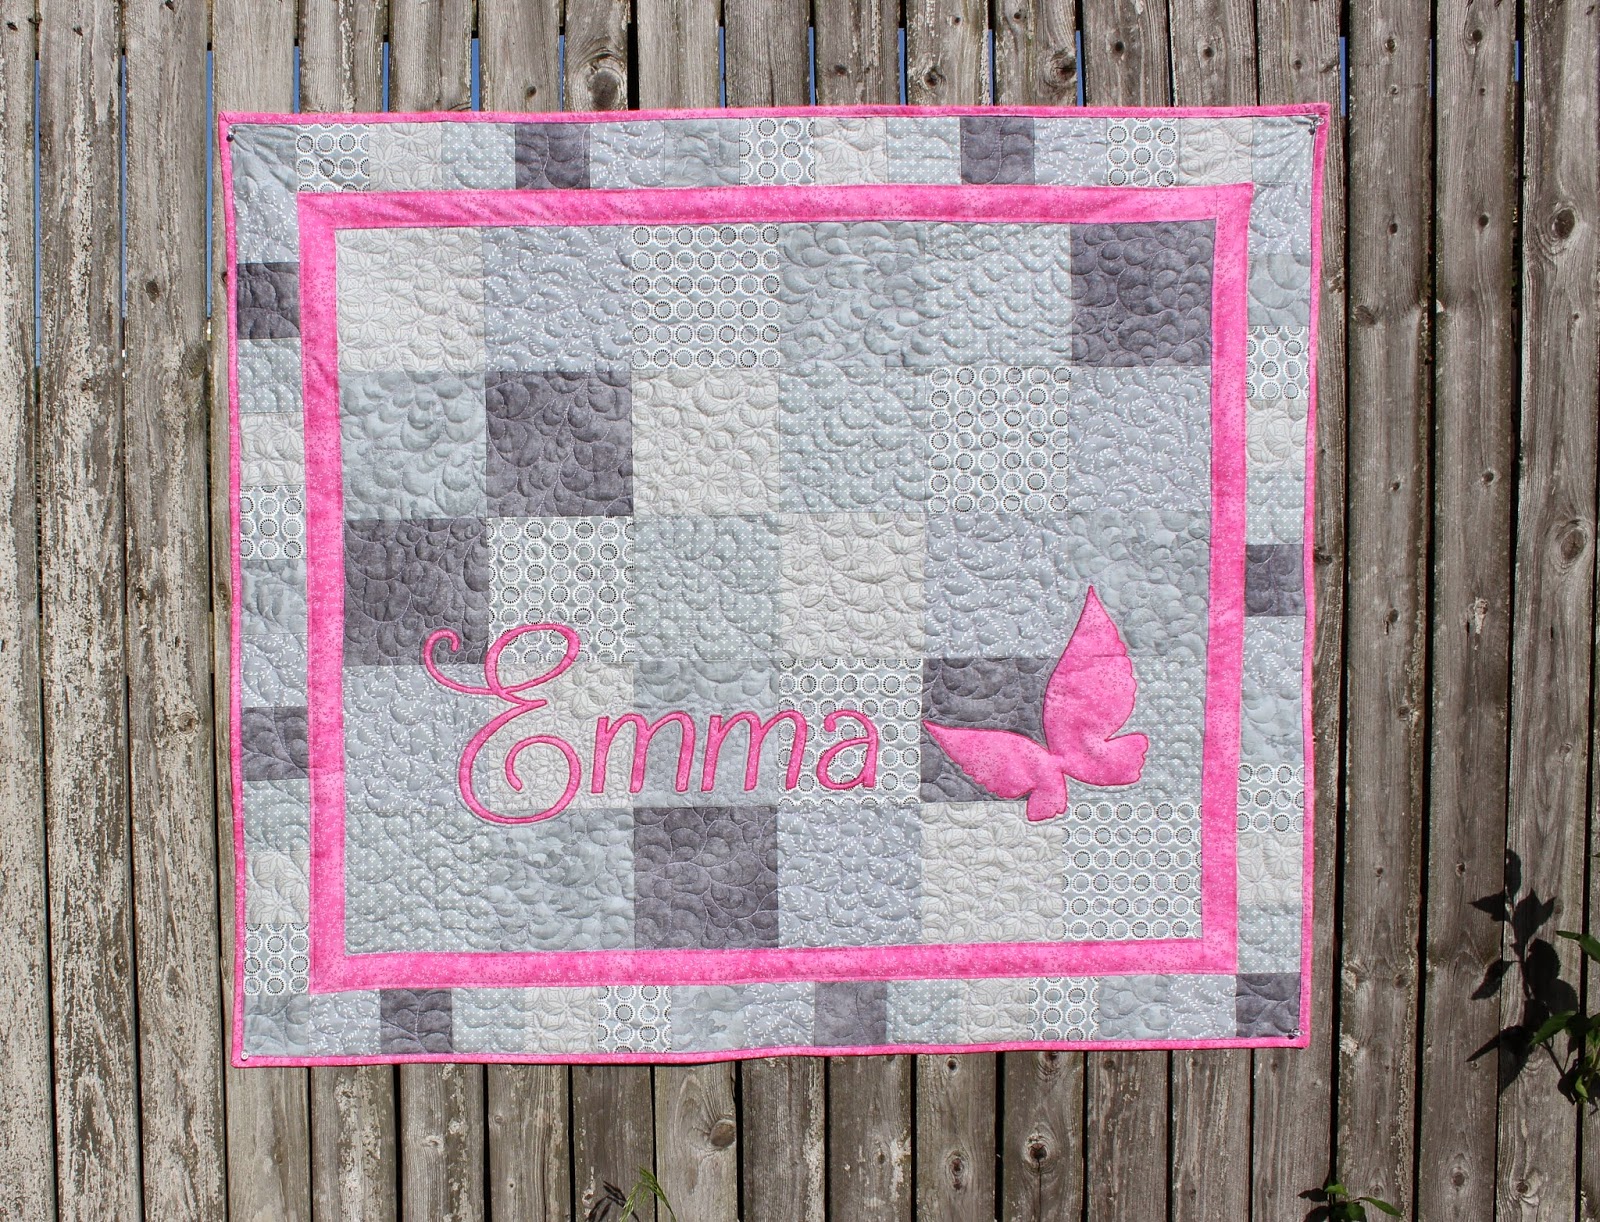
For the quilt TOP I pieced together feminine prints of pink and grey.  Honestly, I'm not real sure what I was going for here - just scrappy I guess!!  Who knows, it was late when I came up with this design ;c)  I think a quilt looks best when you incorporate elements from the back on the front, and vice versa.  So for the front, I appliqued circles of minkee and also used the minkee as the binding.

** I have a tutorial on how to do self-binding with fleece HERE**

 And for the backing I took one of the pink floral prints and used it to applique her name.
In this last picture you can get a good look at the quilting design I used.   I always want to try these fun large-scale quilting motifs, but am always too scared.   I love the look of all-over free-hand feathers, but every time I attempt them I regret it.   I think maybe it's because I think every tiny bit of space needs to be quilted - and everything needs to be touching.   
So for my last couple projects I have been trying to use more negative space.   I think just as rainbow colors only look good with a good amount of WHITE.   . . . "fancy" quilting only look good when there is some negative space?  Maybe?   I'm working on it anyway! 


Monday, October 6, 2014

2 Quilts made of baby clothes

If you would like a quilt made from your child's clothing, please email me or send me a message on facebook !
www.facebook.com/KatiesQuiltsandCrafts - KatiesQuiltsandCrafts@gmail.com  subject "quilt"
Contact me if you have any questions - detailed price list on facebook under "general info" -  additional photos of baby clothes quilts on facebook in the album titled "T-shirt/clothing quilts"


I accidentally deleted most of the photos of these quilts before blogging them.  But I DID find these few photos from facebook and flickr!

I really really enjoy making these quilts out of baby clothes.   Like T-shirt quilts, they are similar to putting together a jigsaw puzzle.  I lay out all the pieces on the floor, fuse the pieces, cut, and then fill in the gaps with alternating colors from the clothes.   This is the 3rd and 4th quilt I have made using baby clothes.   For these, I tried using more of the details from the clothing.  You can see in the closeups that I kept some of the stuffed toys in tact.   I also tried to keep embroidered details, buttons, pockets, etc.,  -  It's much more difficult doing it this way and most of the stuff has to be done by hand.  But I DO think it's worth it in the end.


I can use onesies, bibs, shirts, pants, jerseys soft hats, blankets and small stuffed toys.  And don't worry about holes or stains because before anything goes into the quilt, it's backed with stabilizer, and the finished quilt is quilted thoroughly so stains are hidden (or cut around.)


Saturday, July 5, 2014

2 Quilts finished for Baby Holden and Baby Corey

So many babies being born!!   So many of my friends are having babies right now - what a blessing. .  and what a joy to get to make so many fun baby quilts!  I love the look of this style of baby quilt.   Simple patchwork border, and solid center with the appliqued name.   Perfect for "tummy time" and . . PHOTOS!

Baby Holden, will be born to my friends the Roopers, Missy and Jason.   Their baby's room is very MODERN and colorful, full of bright orange, turquoise, grey and chevrons.

Baby Corey will be born to my friends Beth and Matt.  They have a more traditional style with boyish greens, browns, and dusty blues.

Each style equally beautiful, and equally unique.  So I had lots of fun making these together.


 A closeup of the quilting.  I went with a "modern" style of quilting for the modern quilt, and a more "traditional" motif for the traditional one.


 Here I am assembling a monkey ;c)
Quilt TOPS finished, complete with applique, before quilting.

Beth's Quilt for Baby Emma


 A beautiful baby quilt with patchwork greys in subtle prints, with pretty pink applique, border, and binding.
 Here's the top finished, and basted before adding applique.
 I do a technique called raw-edge fusible applique, and I go through all layers of the quilt.    So here I start with the background quilting first.  I'm using a paisley flower motif.

 Love the quilting ;c)

Monday, April 7, 2014

Rocking Horse Baby Quilt

Finished Rocking Horse Quilt for my friends the Ritchie's new baby girl.

Started off by googling a photo of a rocking horse "clip art" style.   This one was the most prominent one and looked the most user friendly.   I tweaked it a bit, adding hearts, and seperating the pieces by fabrics.   I laid out the fabrics and labeled them A, b, C, D, etc., and wrote the label on the rocking horse clip art. 

Here I am tracing the Rocking Horse. . and making the EXACT SAME MISTAKE I continually make and have made a gazillion times:  I did not print the image in reverse!   Remember if you are doing fusible applique to print your image in reverse.  However, since I wasn't doing text or anything direction -specific, I left it as-is.  The rocking horse will just be in the opposite direction in the finished quilt! 

After fusing all the applique pieces, I used the leftovers to make a beautiful piano-key border!  I went ahead and sewed the border on.  I like my quilt top to be completely finished before starting the raw-edge fusible applique process.  

Next I just fused my pieces, and stitched them down.  I mostly used a buttonhole stitch for this project, but I also used a straight stitch with a darning foot in some of the tighter areas.  

I free-motion embroidered the baby's name in the bottom area. I used Wonderfil's Spaghetti thread for this.  (It's the thickets thread I have found that still works in my machine!)


When I took this picture, it had been 2 weeks straight of cold and snow, so I coudln't wait any longer, I had to go ahead and take the photo.  

Here I am quilting a wide whimisical feather stitch with variegated polyester longarm thread by Aurifil.  Then I used a white cone polyster thread by connecting threads for the white area.  

The photo on the left is the one Karen picked out and wanted me to try to recreate - the one on the right is my finished creation.   I had a FQ bundle of Aunt Jane 1930s reproduction fabrics that I wanted to use up and this project was perfect!


I had a cone of  Aurifil longarm thread (that I LOVE) but cotton is great too - especially on a regular domestic sewing machine.  

Wednesday, March 27, 2013

Franki's Baby Quilt

I made this quilt for my friend Franki, who is having a baby next month:  "Mia." 
She wanted Pink and Green, so I dug through my pinnk and green scraps.  The piecing for the front and back I kept relatively simple, but I went crazy with the quilting.   my favorite part ;c)

Here is the front and back before sandwiching. 

 I divided the quilt up in diamonds and wanted a 1/2' puffy line between each quilting motif.  In the above photo I had just finished the trapunto for Mia's name, the pebbling in the 1st section, and half the feathers in the 2nd section.
Here I had just finished all the quilting.  

Before trimming and binding.  
Closeup of the quilting. 

 andddd. . front and back finished!

All of the quilting was done with NEW Aurifil polyester longarm thread.  The pastel variegated thread looked perfect against the pink and green fabrics.   . . used in the top AND bobbin.

Wednesday, November 21, 2012

Quilt made from baby clothes from the 1980s


Just finished a quilt made from my friend's baby clothes.  
These baby clothes were given to a quilter who was going to make a quilt out of them, but she got sick or got busy or something, and never was able to finish it.   This previous quilter had cut up all the clothing into (rough) rectangles that measured 2.25" x 2.5"  Some of these rectangles had been sewn into 9-patches.  Everything was cut with a template and regular hand scissors (=c0
 I thought it was odd that they were cut this size.   Typically 9-patches are cut into squares, not rectangles.   Also, if the squares were 2.5", as you probably can imagine, the possibilities for the blocks would have been MUCH greater.   The blocks and therefore the QUILT could have been much bigger and there would have been many more block options, etc., 
BUT, I love a challenge, and so what I did was cut most of them down to 2" and treated them as strips to use with the EZ angle ruler.  This way I could do flying geese and HSTs for blocks.   I also cut a few of them into 2" squares and made NEW (even) 9-patches:c)   

 Here you can see the previous quilter's 9 patch block on the left, ,and my flying geese block on the right.
And here are an assortment of the 9-patch blocks on the top, and an assortment of my NEW blocks on the bottom.  All of my new blocks measured 4.5" UNfinished.   The HSTs of those sawtooth stars measured 1" FINISHED ! LOL ;c)   Yes, very teeny tiny!

The finished quilt top:   All of the fabric for the blocks (including the white) was made out of baby clothing.  The striped rose print for the sashing and binding was picked out by the quilt's recipient.  My friend, Beth, was nicknamed "Rose" when she was a little girl, so the rose has special significant to Jackie, her mom (for whom I made this quilt)
I found the inner border floral fabric and outer border pink fabric at Phylis's Quilt shop in Hurricane  (Thank you for your help picking out fabrics Phyllis!!).   The floral-y fabric had such a beautiful, vintage 80s-feel to it I think.   AND, it included all the colors from Beth's baby clothes.  It also helped make that transition from the stark white of the baby clothes used in the blocks. . to the creamy beige used in the striped rose print.   I never thought I could make white and beige work together, but I really think it works in this quilt!

After all the piecing was complete - it was time for Katies' fun playtime. LOL
For each of the blocks, I quilted a circle/feather type of deal.  I made a circle template with cardstock and marked just the outer circle, and did the feathers and inner circle by hand.  (which is why they're not perfect and I WILL mark them NEXT time!)

 For the inner borders, I quilted a feather with an echo, but as you can see in the next photo, I was not satisfied with just a normal feather.
 I thought the feathers were too fat, so I added a vein in each one to fill it out a bit.  This was the first time trying this technique and I really like the way it looks!
 For the sashing and outer borders I tried another new quilting motif. . a free-hand leaf pattern.   It definitely would have looked better if I would have marked it first.. . I started to mark it, and then got really confused on the math, and gave up ;c)
 For the pink and rose striped areas, I used Mettler cotton pink thread.  For the white/block areas and the feathers, I used #Aurifil poly variegated quilting thread.   When Jackie saw the quilt in person, she said she really liked the variegated colors.   Since they are a fine pastel, with a bit of shimmer, I thought it was perfect for this quilt too!


 And right now I'm working on a photo memory quilt - with the colors sage, brown and white.  I picked out these fabrics for the quilt and will have a blog post on it soon! ;c)