Each Year around Christmas, our Quilt guild does a challenge project. . similar to the Hoffman Challenge. We are given two FQs of supposedly "ugly" or mismatched fabrics and we are supposed to make a quilt of them. There are several categories and the winners receive gift certificates to our local quilt shop! It's SO much fun and I look forward to it every year! This year, as you know, I have a new baby girl. I seem to always forget which Monday my guild meeting is held on. This year, I look at my phone a couple days after the Christmas guild meeting. .and I realize I Have MISSED it!! So dissapointing. Oh well, I won't win anything, but I'll take my project to the next guild meeting and show it off ;c) I'm just sad I will have missed all the other ones. I love seeing what everyone can do with the same fabrics.
My Challenge project is titled "Home-Sweet-Home" and is inspired by a whimsical family tree. The family tree aspect is especially meaningful to me this year with my new addition to our family.
This year the FQs matched PERFECTLY. . so it was hardly a challenge to match them haha. The two fabrics I used for the quilt's borders, and also the large-print floral fabric I used for all of the leaves. I embroidered "The Wiseman's" on the top, and used raw-edge fusible applique for all the pieces. I quilted around the small areas with pebbles, and the larger areas with spirals. There is a straight feather in the borders (which I don't like becuase I Used too light of a color of thread ugh) no way I would undo it though! LOL
Showing posts with label feathers. Show all posts
Showing posts with label feathers. Show all posts
Friday, January 3, 2014
Wednesday, July 31, 2013
Twisted Log Cabin
I made a 2nd Twisted Log Cabin quilt, again using my hand dyed gradated fabrics, but this time with a BLACK and grey background. My original TWISTED LOG CABIN quilt post is still my most popular post on my whole blog! Unfortunately though, that quilt is ruined because I used a yellow chalk to mark quilting lines and it would NOT come out in the washing machine. =c(
I can't believe I haven't uploaded a photo of this quilt yet!!! I still haven't had a chance to get a decent photograph of it, but today it is raining, so an indoor photo will have to suffice . . for now.
My cut-out colored paper pieces, and my LIST
and here are all of the fabric pieces to start the sewing!! I just LOVEEEE the organization part of this quilt! (I know I am sick)
Here are all of the finished sewn triangle pieces laid out on the table. Thank GOD they all fit!!! ;c)
This is what my floor looks like next to my sewing machine when I am paper piecing ;c) I just go and snip the excess fabric off using scissors.
The back of the quilt looks cool too. But now it was time for the hard part - pulling out all the paper! Here are some photos of me pulling out some of the paper pieces.
The finished center/top. I added some black borders to this to make the quilt rectangular. I wanted to do some fancy fun feathers to this ;c)
Here I start the quilting in the black/grey areas, little half feather motif.
I just loved the way this center pinwheel looked once it was quilting!
Here are all of the finished black/grey areas!
and. . this is a horrible photo, (i promise I'll get some better ones ASAP) . . but I wanted to get a picture of the colored areas. I wanted the colored pinwheels to really POP. . even stick out a little bit. . so I did a very simple motif in this area. I did a curved sorta outline around each "petal" and then did a curly-Q in the center. I liked the way it turned out!
In the borders/outer black areas, I did a very tight feather motif. I actually DON"T like what I did in this area as much. . .BUT. . It is a very dense quilting design. . . almost TOO dense I think. I feel that if I made the outer feathers a bit fatter I would have been more satisfied ;c)
Labels:
black grey,
feathers,
gradated dyes,
hand dyes,
quilt,
rainbow,
Twisted Log Cabin
Wednesday, March 27, 2013
Franki's Baby Quilt
I made this quilt for my friend Franki, who is having a baby next month: "Mia."
She wanted Pink and Green, so I dug through my pinnk and green scraps. The piecing for the front and back I kept relatively simple, but I went crazy with the quilting. my favorite part ;c)
Here is the front and back before sandwiching.
I divided the quilt up in diamonds and wanted a 1/2' puffy line between each quilting motif. In the above photo I had just finished the trapunto for Mia's name, the pebbling in the 1st section, and half the feathers in the 2nd section.
Here I had just finished all the quilting.

Before trimming and binding.
Closeup of the quilting.
andddd. . front and back finished!
All of the quilting was done with NEW Aurifil polyester longarm thread. The pastel variegated thread looked perfect against the pink and green fabrics. . . used in the top AND bobbin.
Labels:
#Aurifil,
Baby Quilt,
feathers,
FMQ,
free-motion quilting,
green,
hearts,
mctavishing,
pebbles,
personalized,
pink,
simple patchwork,
stippling,
Trapunto
Wednesday, November 21, 2012
Quilt made from baby clothes from the 1980s
Just finished a quilt made from my friend's baby clothes.
These baby clothes were given to a quilter who was going to make a quilt out of them, but she got sick or got busy or something, and never was able to finish it. This previous quilter had cut up all the clothing into (rough) rectangles that measured 2.25" x 2.5" Some of these rectangles had been sewn into 9-patches. Everything was cut with a template and regular hand scissors (=c0
I thought it was odd that they were cut this size. Typically 9-patches are cut into squares, not rectangles. Also, if the squares were 2.5", as you probably can imagine, the possibilities for the blocks would have been MUCH greater. The blocks and therefore the QUILT could have been much bigger and there would have been many more block options, etc.,
BUT, I love a challenge, and so what I did was cut most of them down to 2" and treated them as strips to use with the EZ angle ruler. This way I could do flying geese and HSTs for blocks. I also cut a few of them into 2" squares and made NEW (even) 9-patches:c)
And here are an assortment of the 9-patch blocks on the top, and an assortment of my NEW blocks on the bottom. All of my new blocks measured 4.5" UNfinished. The HSTs of those sawtooth stars measured 1" FINISHED ! LOL ;c) Yes, very teeny tiny!


The finished quilt top: All of the fabric for the blocks (including the white) was made out of baby clothing. The striped rose print for the sashing and binding was picked out by the quilt's recipient. My friend, Beth, was nicknamed "Rose" when she was a little girl, so the rose has special significant to Jackie, her mom (for whom I made this quilt)
I found the inner border floral fabric and outer border pink fabric at Phylis's Quilt shop in Hurricane (Thank you for your help picking out fabrics Phyllis!!). The floral-y fabric had such a beautiful, vintage 80s-feel to it I think. AND, it included all the colors from Beth's baby clothes. It also helped make that transition from the stark white of the baby clothes used in the blocks. . to the creamy beige used in the striped rose print. I never thought I could make white and beige work together, but I really think it works in this quilt!
After all the piecing was complete - it was time for Katies' fun playtime. LOL
For each of the blocks, I quilted a circle/feather type of deal. I made a circle template with cardstock and marked just the outer circle, and did the feathers and inner circle by hand. (which is why they're not perfect and I WILL mark them NEXT time!)
For the inner borders, I quilted a feather with an echo, but as you can see in the next photo, I was not satisfied with just a normal feather.
I thought the feathers were too fat, so I added a vein in each one to fill it out a bit. This was the first time trying this technique and I really like the way it looks!
For the sashing and outer borders I tried another new quilting motif. . a free-hand leaf pattern. It definitely would have looked better if I would have marked it first.. . I started to mark it, and then got really confused on the math, and gave up ;c)
For the pink and rose striped areas, I used Mettler cotton pink thread. For the white/block areas and the feathers, I used #Aurifil poly variegated quilting thread. When Jackie saw the quilt in person, she said she really liked the variegated colors. Since they are a fine pastel, with a bit of shimmer, I thought it was perfect for this quilt too!
And right now I'm working on a photo memory quilt - with the colors sage, brown and white. I picked out these fabrics for the quilt and will have a blog post on it soon! ;c)
Friday, May 11, 2012
Jaime's baby Owl Quilt.
https://www.craftsy.com/quilting/patterns/owl-duet/194369
I told Jaime she couldn't HAVE an owl quilt, because I already made one for Tiffany ;c) BUT, I surprised her, and instead of 1 owl, there's two. Which is fitting because this is her 2nd baby ;c) So that's her two children Morgan and Jack in OWL form sitting on a branch.
Here's the quilt basted and fused.
Here I used raw-edge applique, and a straight stitch with my darning foot. I appliqued the pieces first then filled in the background next.
Here's the background all filled in:
And here's the first feather quilted. I quilted a feather in the colored areas. The green areas uses a shiny variegated green thread from Gutterman.
The blue area uses a Teal shiny variegated thread by Sulky. I added the borders right after I fused down the pieces.
Here's a couple closeups of the quilting ;c)
Here's some photos of the back.
Wednesday, January 25, 2012
Project Quilting #2 Making Music
The song I chose for this project is "The Music Never Stopped." The original artist is John Barlow but the version I like best is when Bobby Weir sings it from the Grateful Dead.
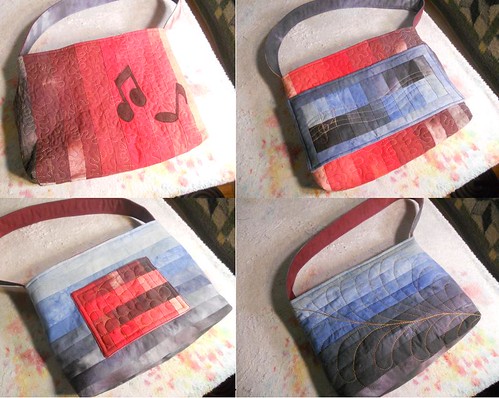
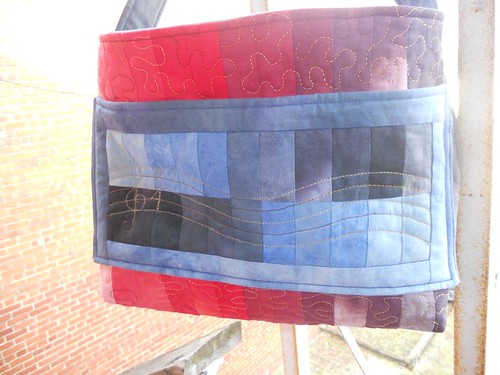
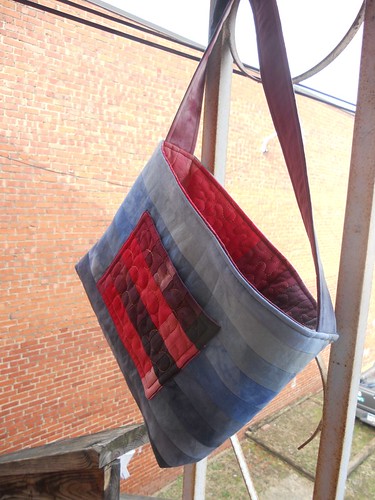
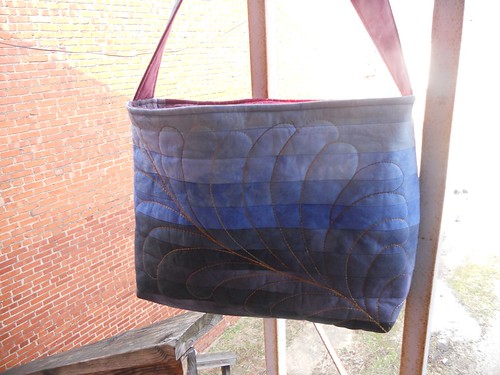
This is a Reversible Quilted Tote.
I used my grated hand-dyed fabrics for this tote and quilted it with my new machine using variegated metalic thread.
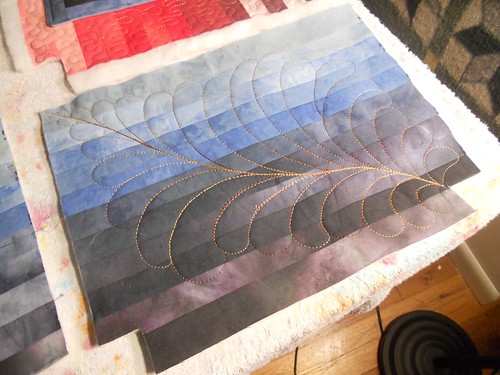
Here are some shots before the tote was assembled:
For the red contrasting pocket I quilted a "hearts" motif. - one of my favorite stitches.
I quilted a large feather on this side
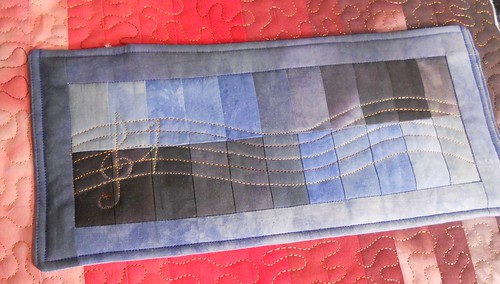
The blue contrasting pocket holds a treble clef, and stippled background
For the musical notes I used Steam-a-Seam II light. The fabric is a fuzzy fabric I hand-dyed brown. . I used a raw-edge applique stitch to secure.
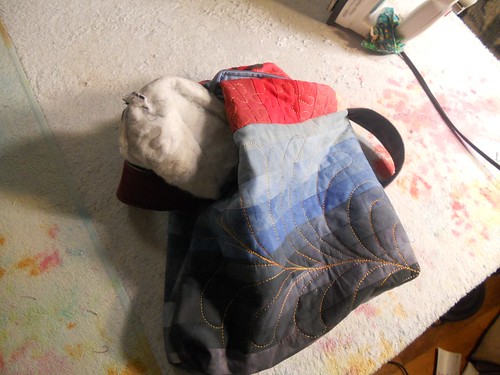
After I had assembled the sides, straps I was ready to turn it RIGHT-SIDE OUT. Since I used batting on both the lining AND the outside . . to make it reversible and have both parts quilted. . it was a bit of trouble getting it turned. This part reminded me of the old "Popples" dolls. tee hee.
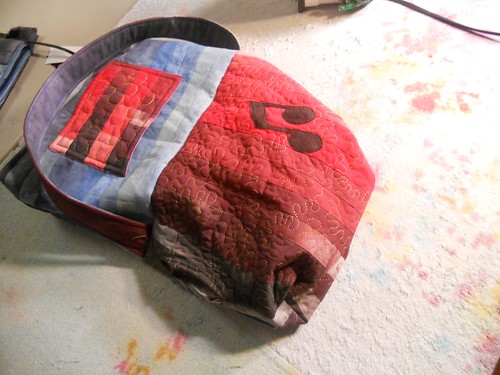
Alright. . all done!
I'm not certain which side is the correct "outside" and "inside" . . But here is the RED sides:
and here is the blue sides:
Closeup of the treble clef pocket
You have until Sunday at Noon to join in the "Project Quilting" Challenge over at Kim's Crafty Apple!
Subscribe to:
Posts (Atom)


